使用 Ansible 和 Jenkins 进行基础自动化部署
本教程详细介绍如何在 Debian 12 (Bookworm) 系统上使用 Ansible 和 Jenkins 实现一个基础的自动化部署流程,目标是将一个简单的 Web 应用部署到远程服务器。
前提条件
- 一台运行 Debian 12 的服务器(作为 Jenkins 和 Ansible 的控制节点)。
- 一台或多台目标服务器(用于部署,需支持 SSH)。
- Git 仓库(例如 GitHub或Gitee)用于存储应用代码。
本文条件
| 序号 | 用途 | 地址 |
|---|---|---|
| 1 | Jenkins 和 Ansible 的控制节点 | 192.168.0.120 |
| 2 | 目标服务器 | 192.168.0.121 |
第一部分:环境准备
1.1 安装 Ansible
在 Debian 12 控制节点上安装 Ansible:
sudo apt update
sudo apt install ansible -y
验证安装:
ansible --version配置 SSH 密钥:
生成 SSH 密钥对:
ssh-keygen -t rsa -b 4096 -f /key/ssh/id_rsa -N ""将公钥复制到目标服务器(假设目标服务器 IP 为
192.168.0.121,用户为root):ssh-copy-id root@192.168.0.121
创建 Ansible 库存文件:
编辑
/etc/ansible/hosts或创建一个自定义文件(如~/ansible/hosts):vim /etc/ansible/hosts[webservers] 192.168.0.121 ansible_user=root ansible_ssh_private_key_file=/key/ssh/id_rsa
测试 Ansible 连接(改成了etc这边):
ansible all -m ping -i /etc/ansible/hosts成功时将返回类似
pong的响应。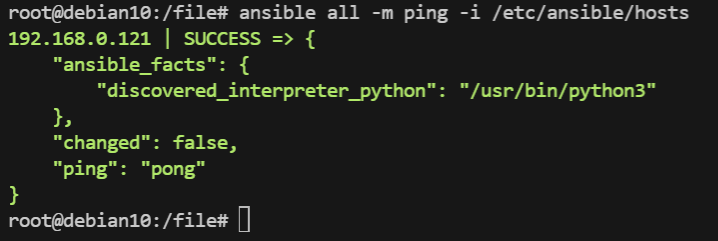
1.2 安装 Jenkins
安装 Java 和 Jenkins:
sudo apt update
sudo apt install openjdk-17-jdk -y
curl -fsSL https://pkg.jenkins.io/debian-stable/jenkins.io.key | sudo tee /usr/share/keyrings/jenkins-keyring.asc > /dev/null
echo deb [signed-by=/usr/share/keyrings/jenkins-keyring.asc] https://pkg.jenkins.io/debian-stable binary/ | sudo tee /etc/apt/sources.list.d/jenkins.list
sudo apt update
sudo apt install jenkins -y
启动 Jenkins:
sudo systemctl start jenkins
sudo systemctl enable jenkins
访问 Jenkins:
打开浏览器,访问
http://192.168.0.120:8080。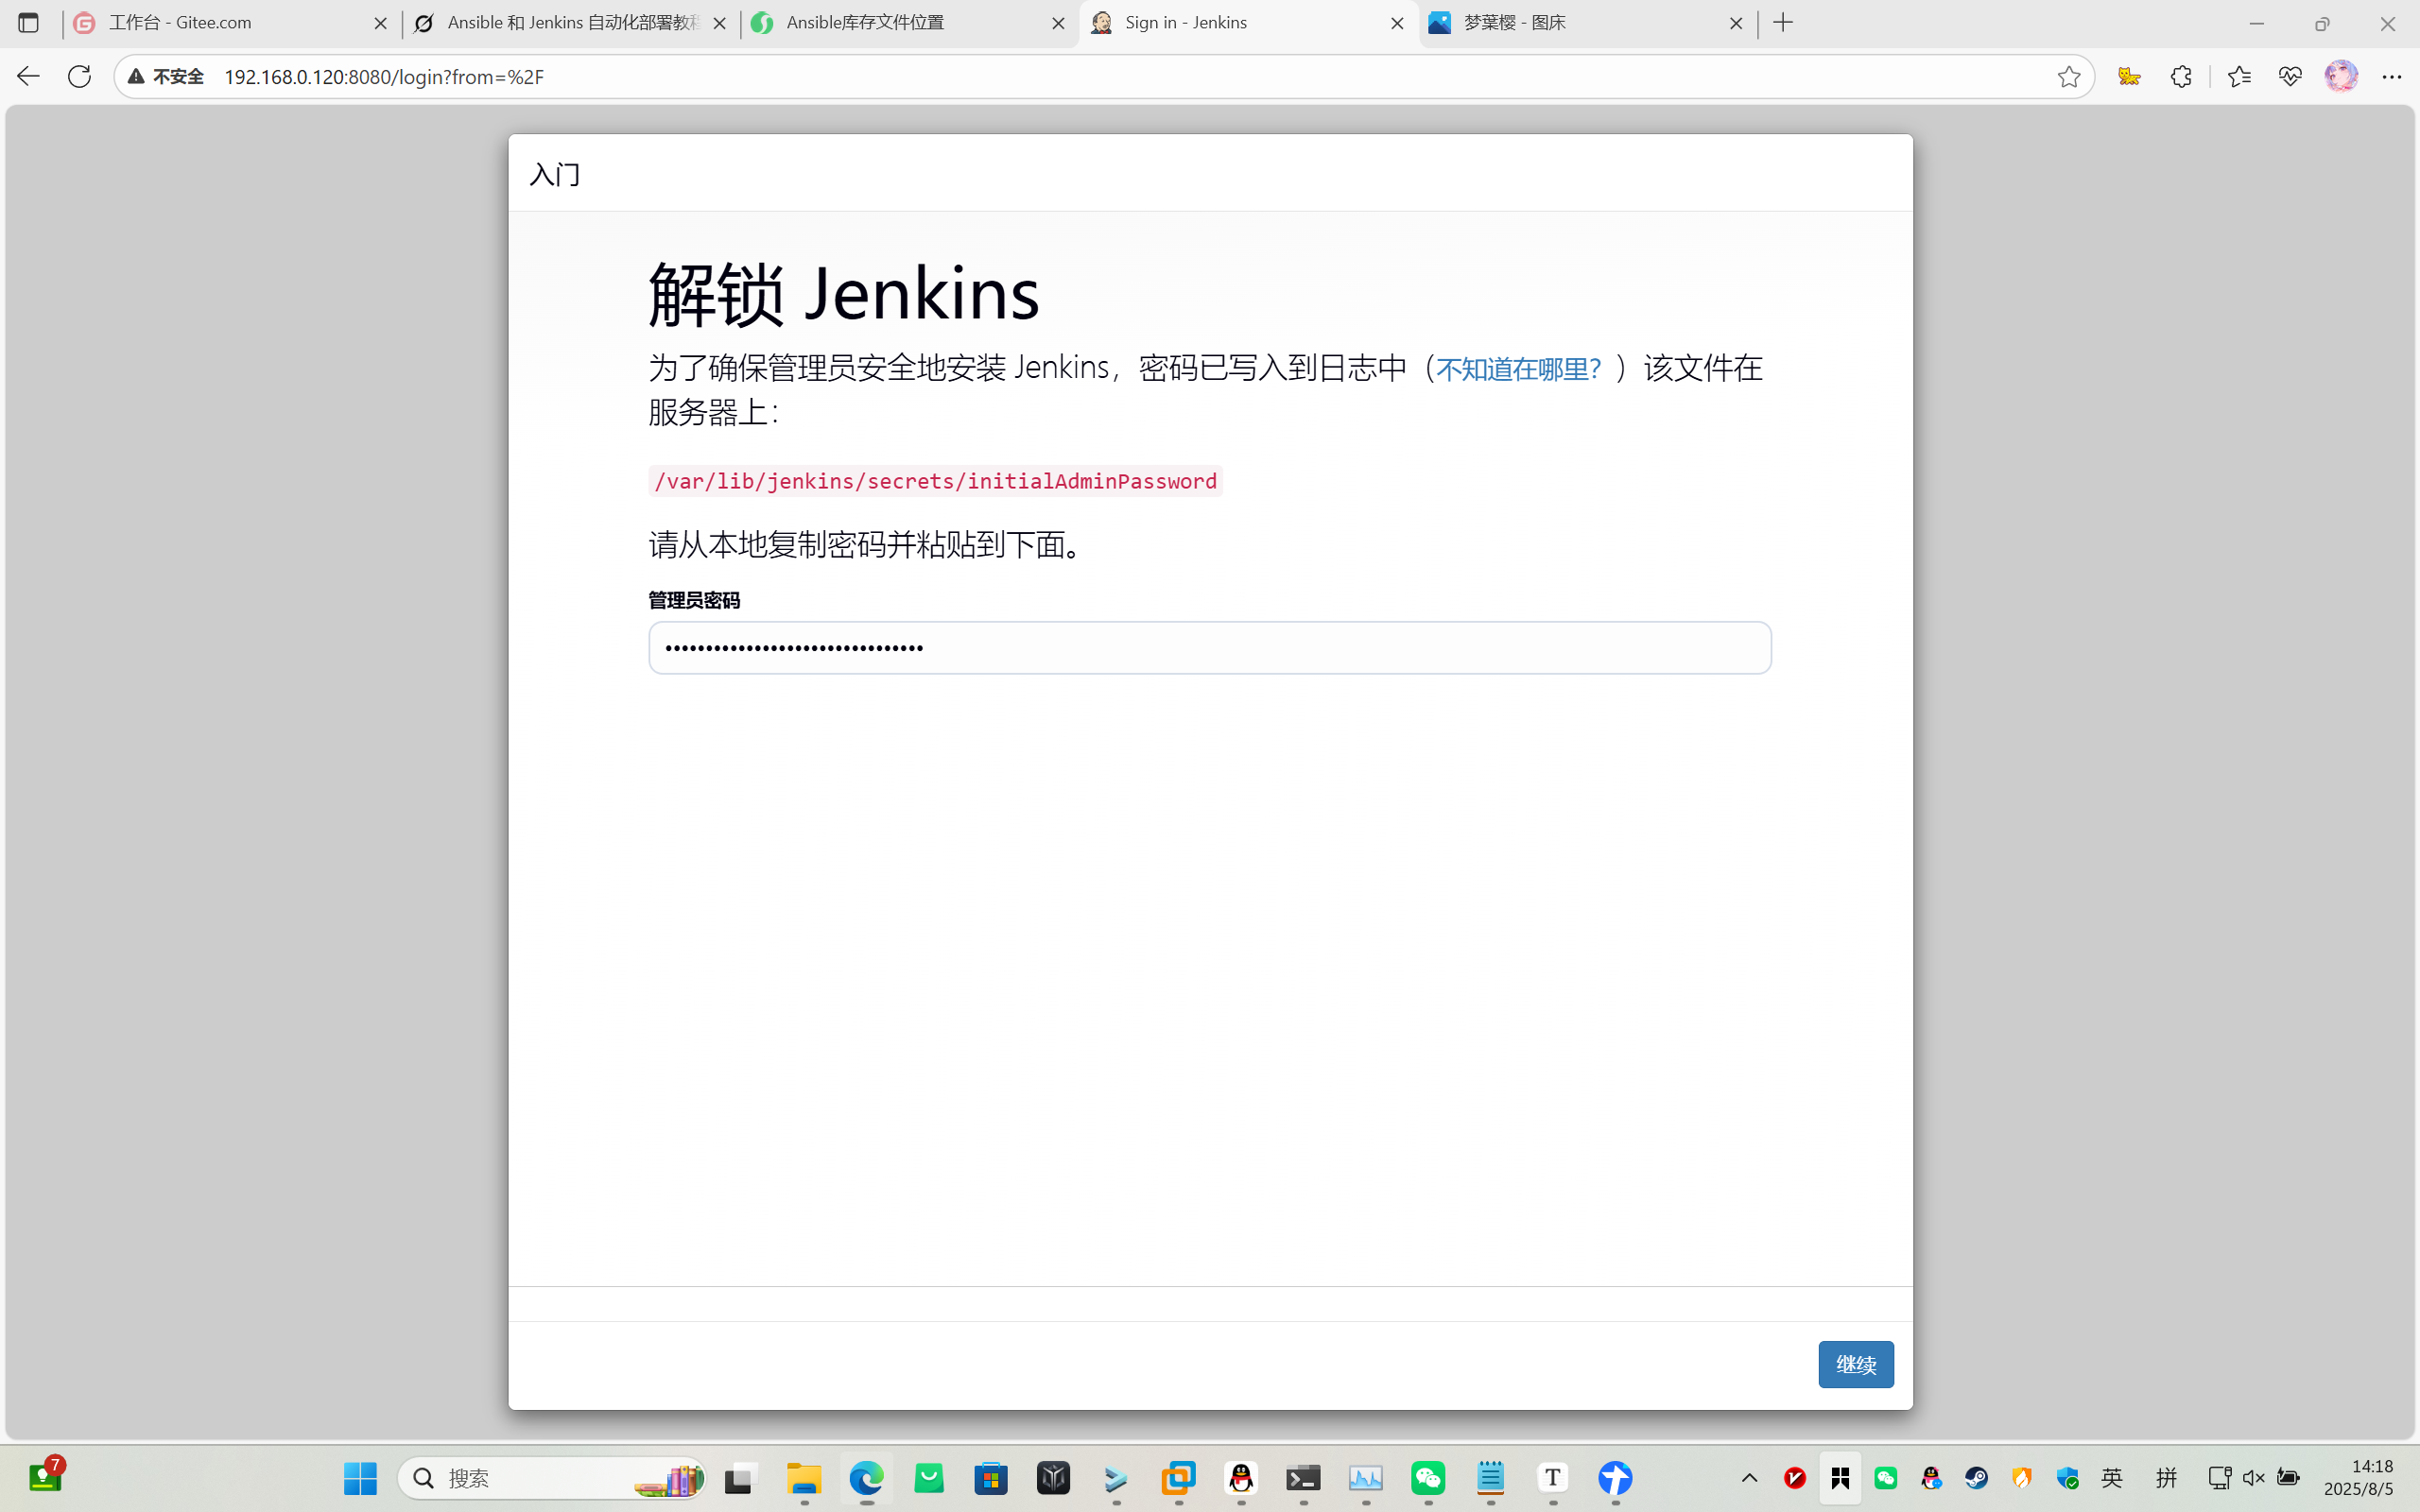
获取初始管理员密码:
sudo cat /var/lib/jenkins/secrets/initialAdminPassword换国内镜像源下载插件(如果下载的慢):
vim /etc/apt/sources.list.d/jenkins.list

https://mirrors.tuna.tsinghua.edu.cn/jenkins/updates/update-center.json
完成向导,安装推荐插件就行。
安装完成!

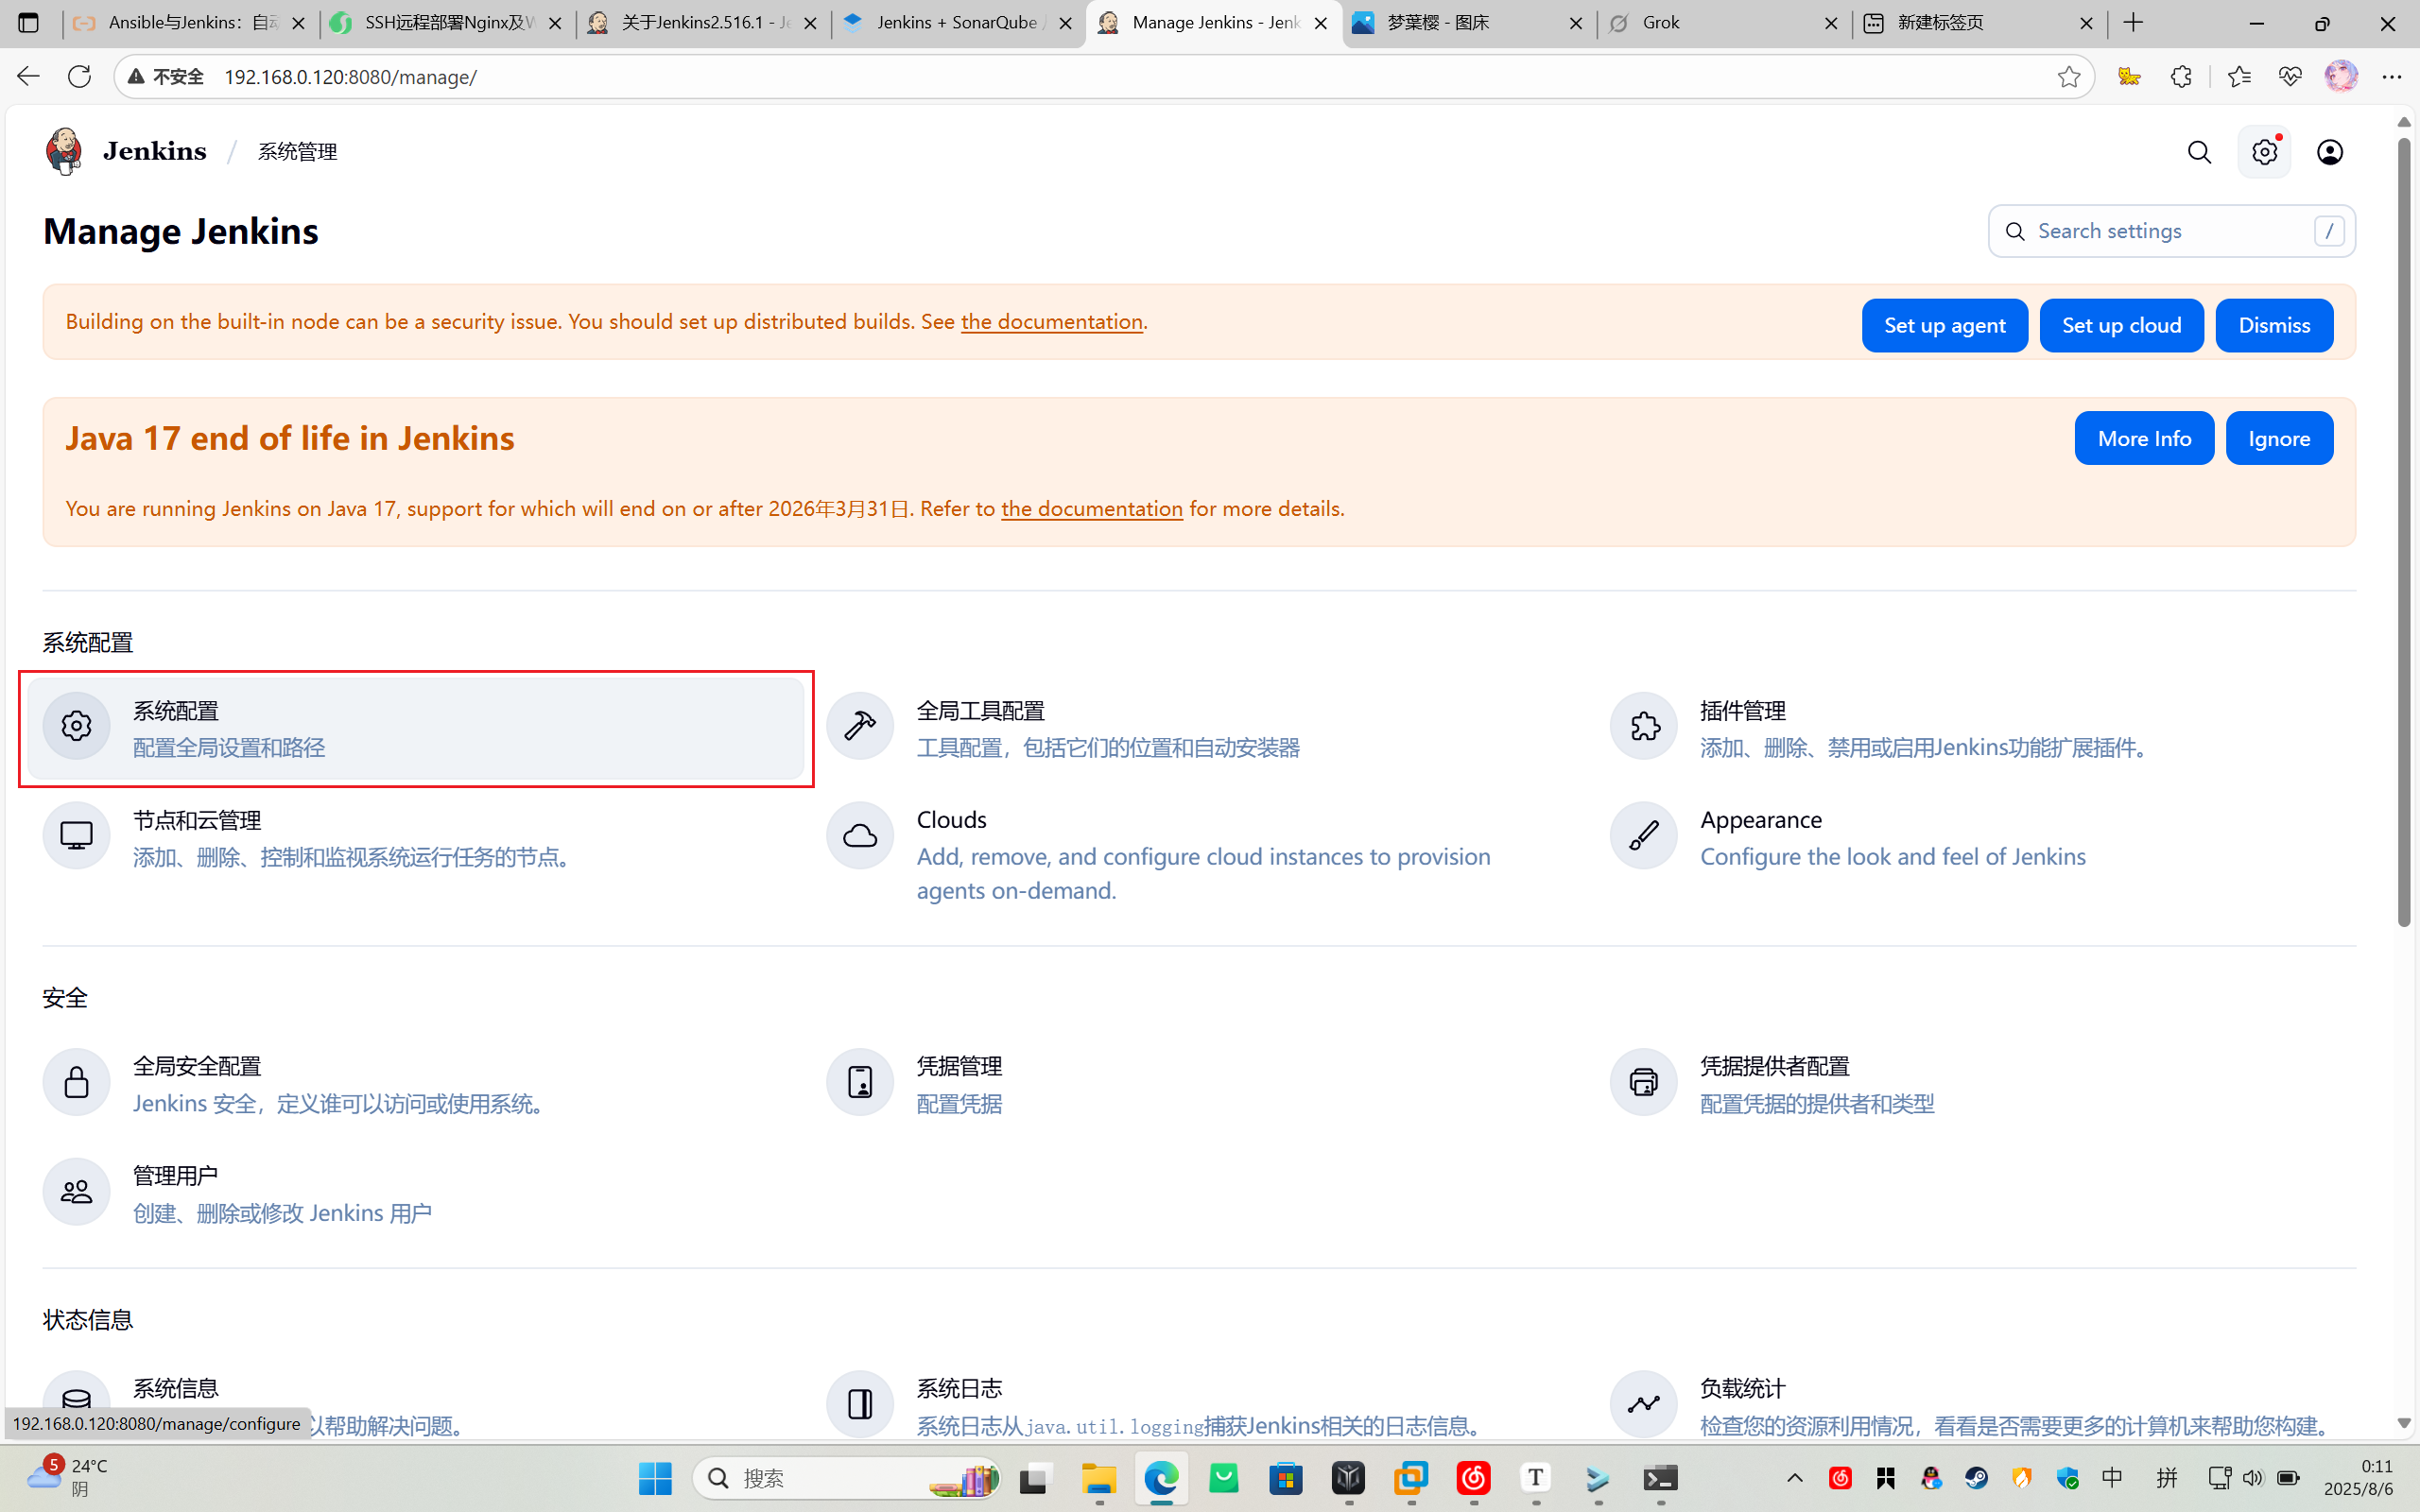
配置 JDK、Git等路径。

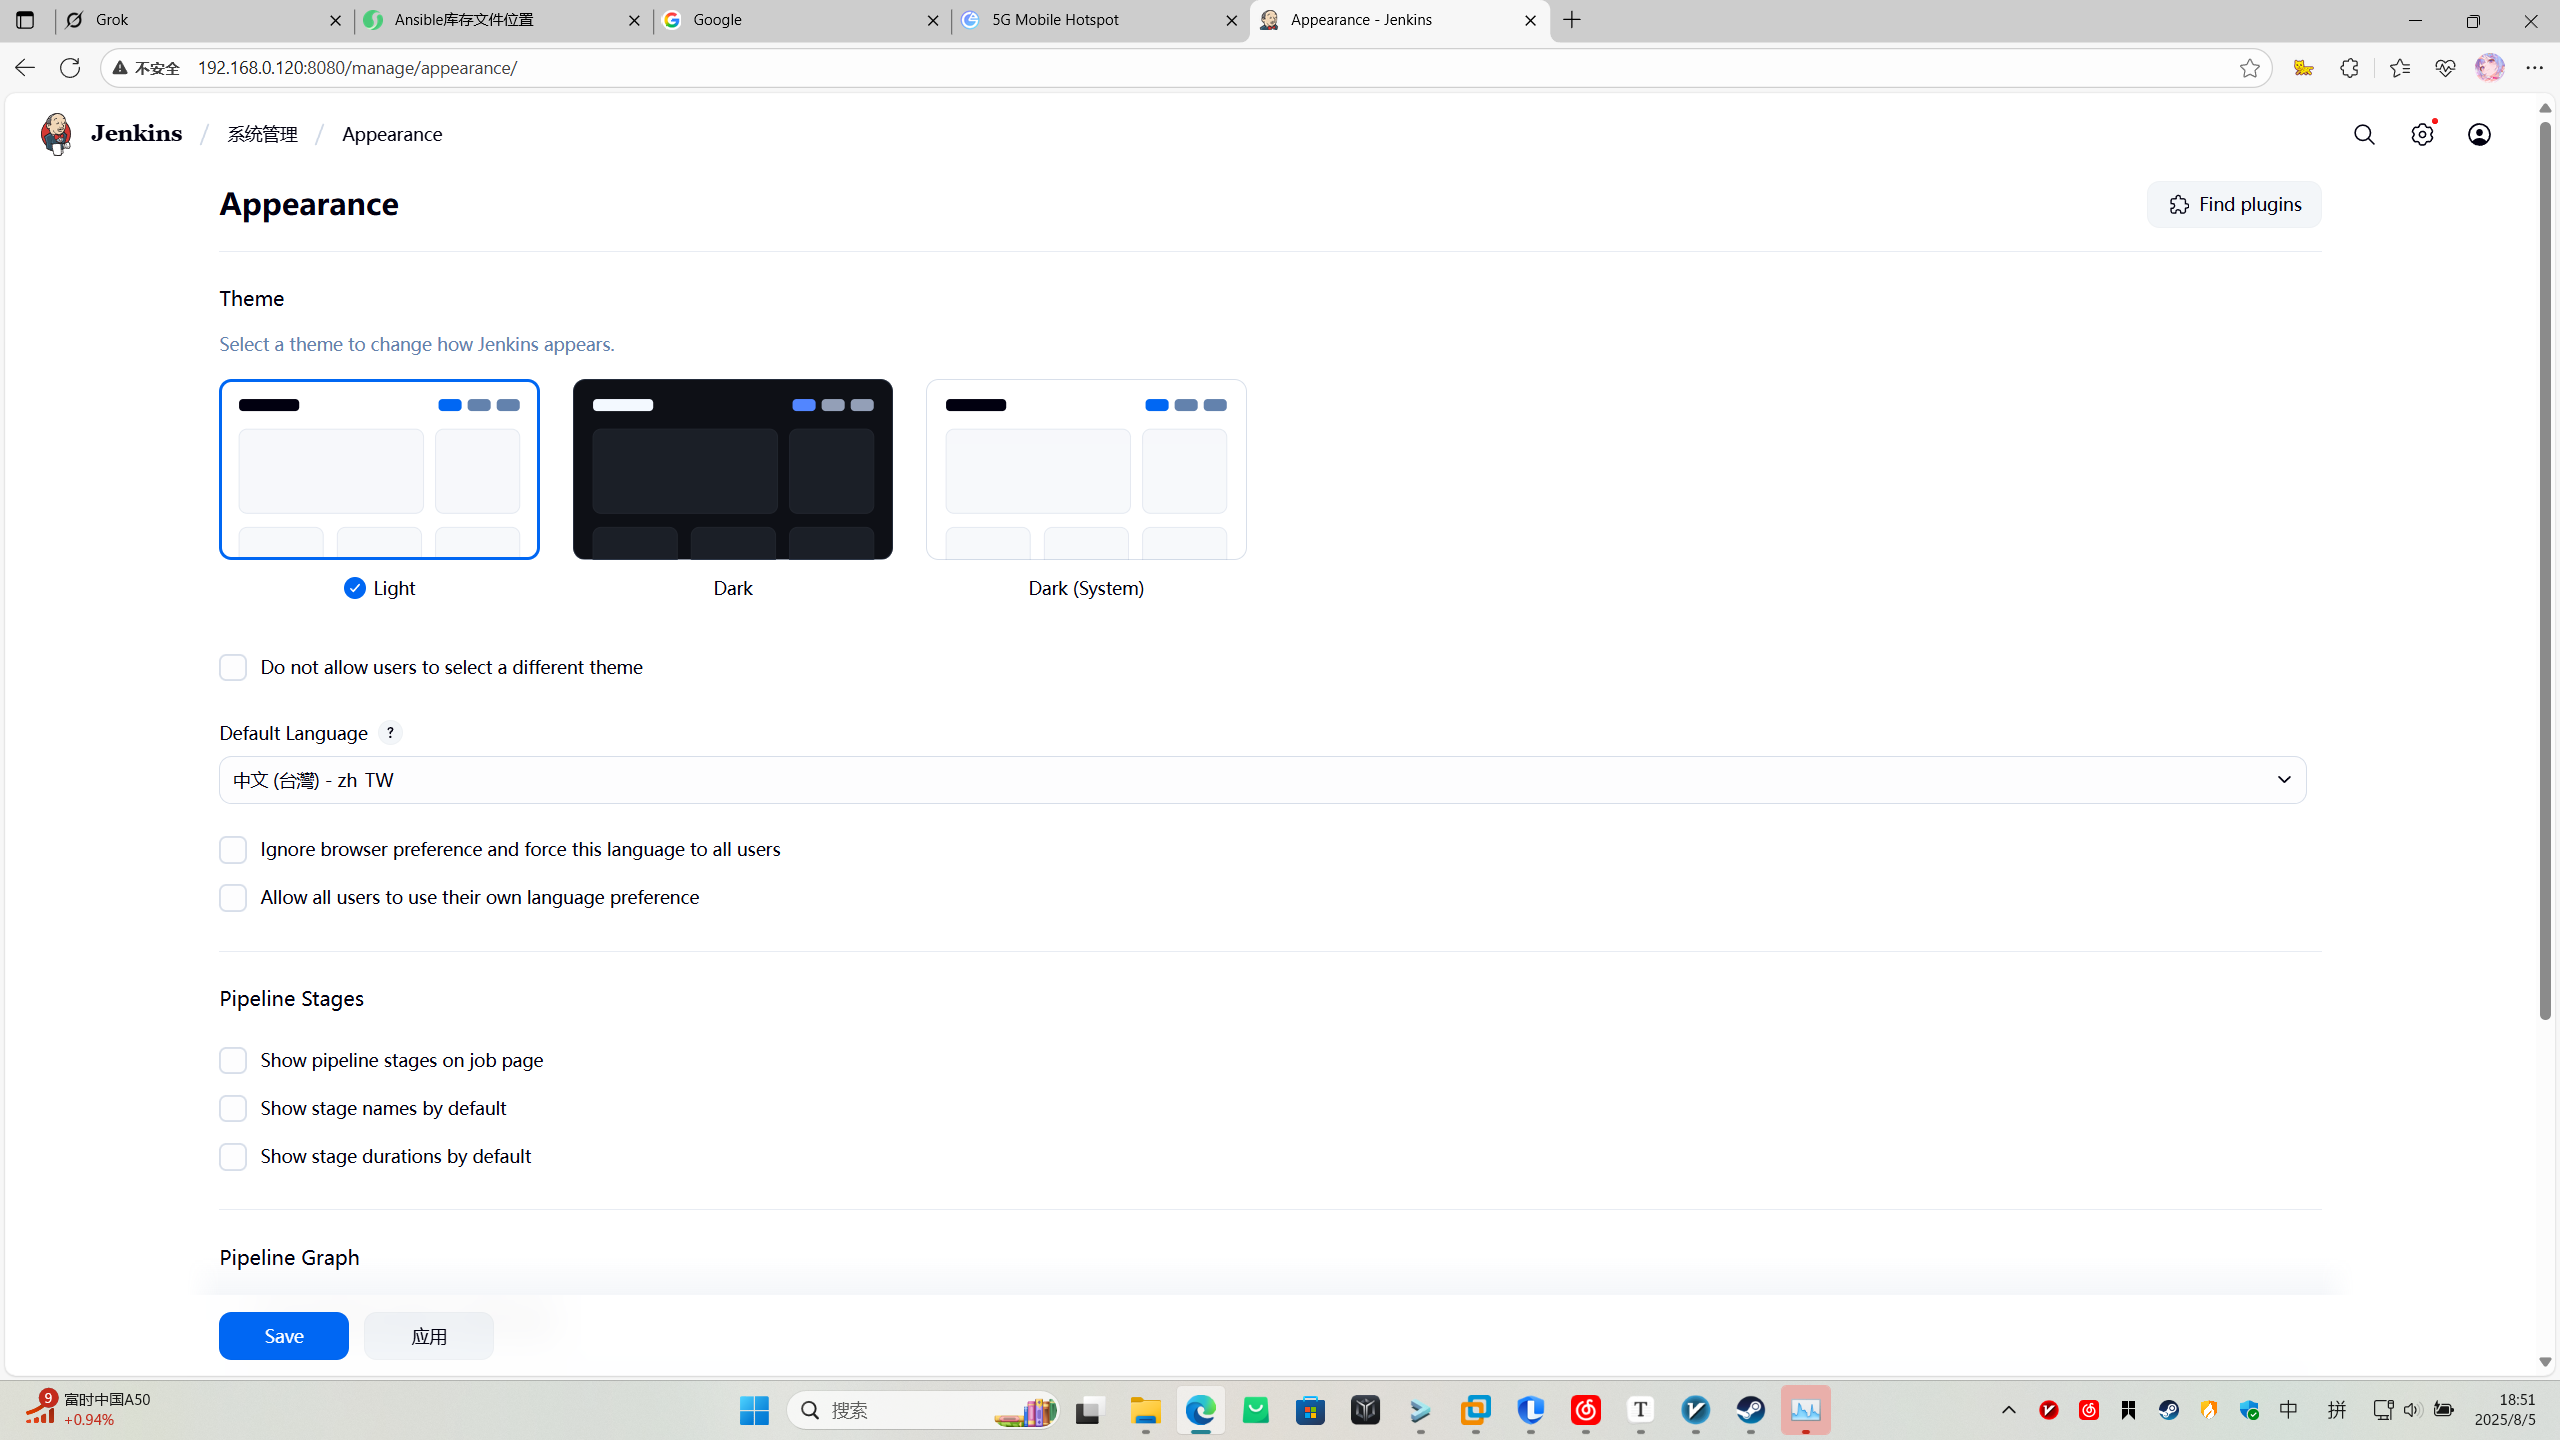
配置中文:
找到appearance选项页面。
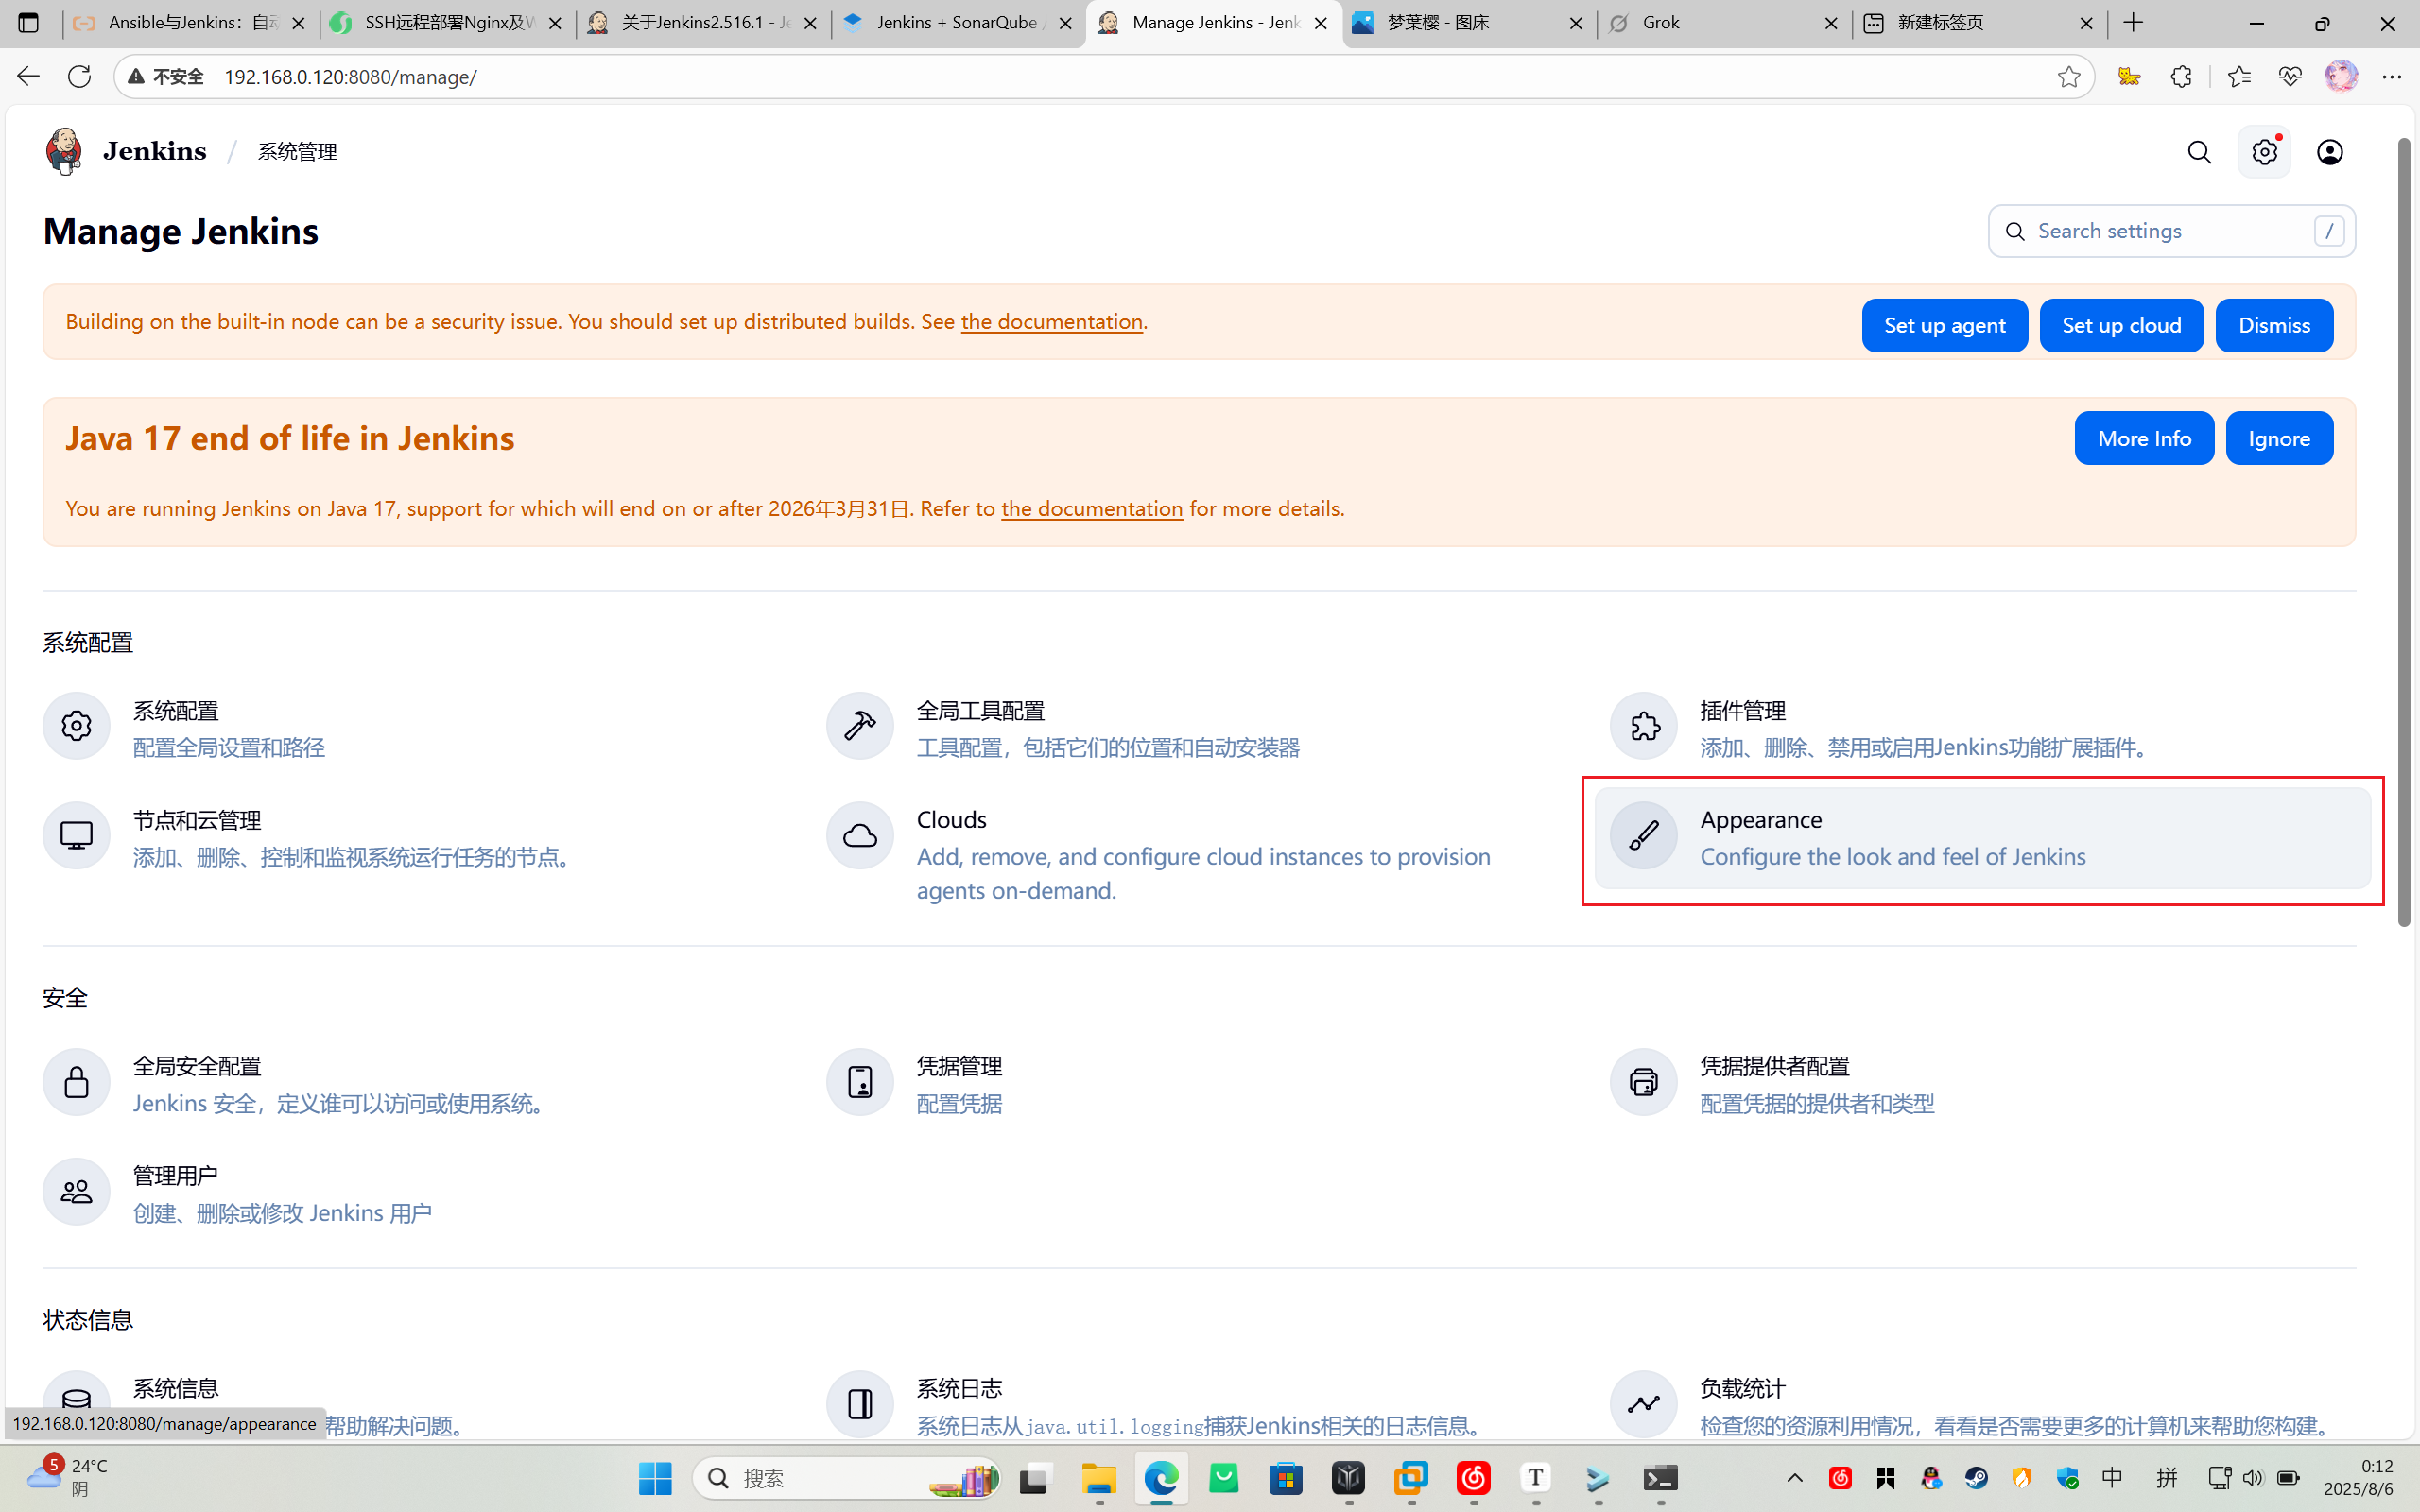
原本是部分汉化,选中国台湾后,不知道为什么大部分都汉化了
安装 Ansible 插件:
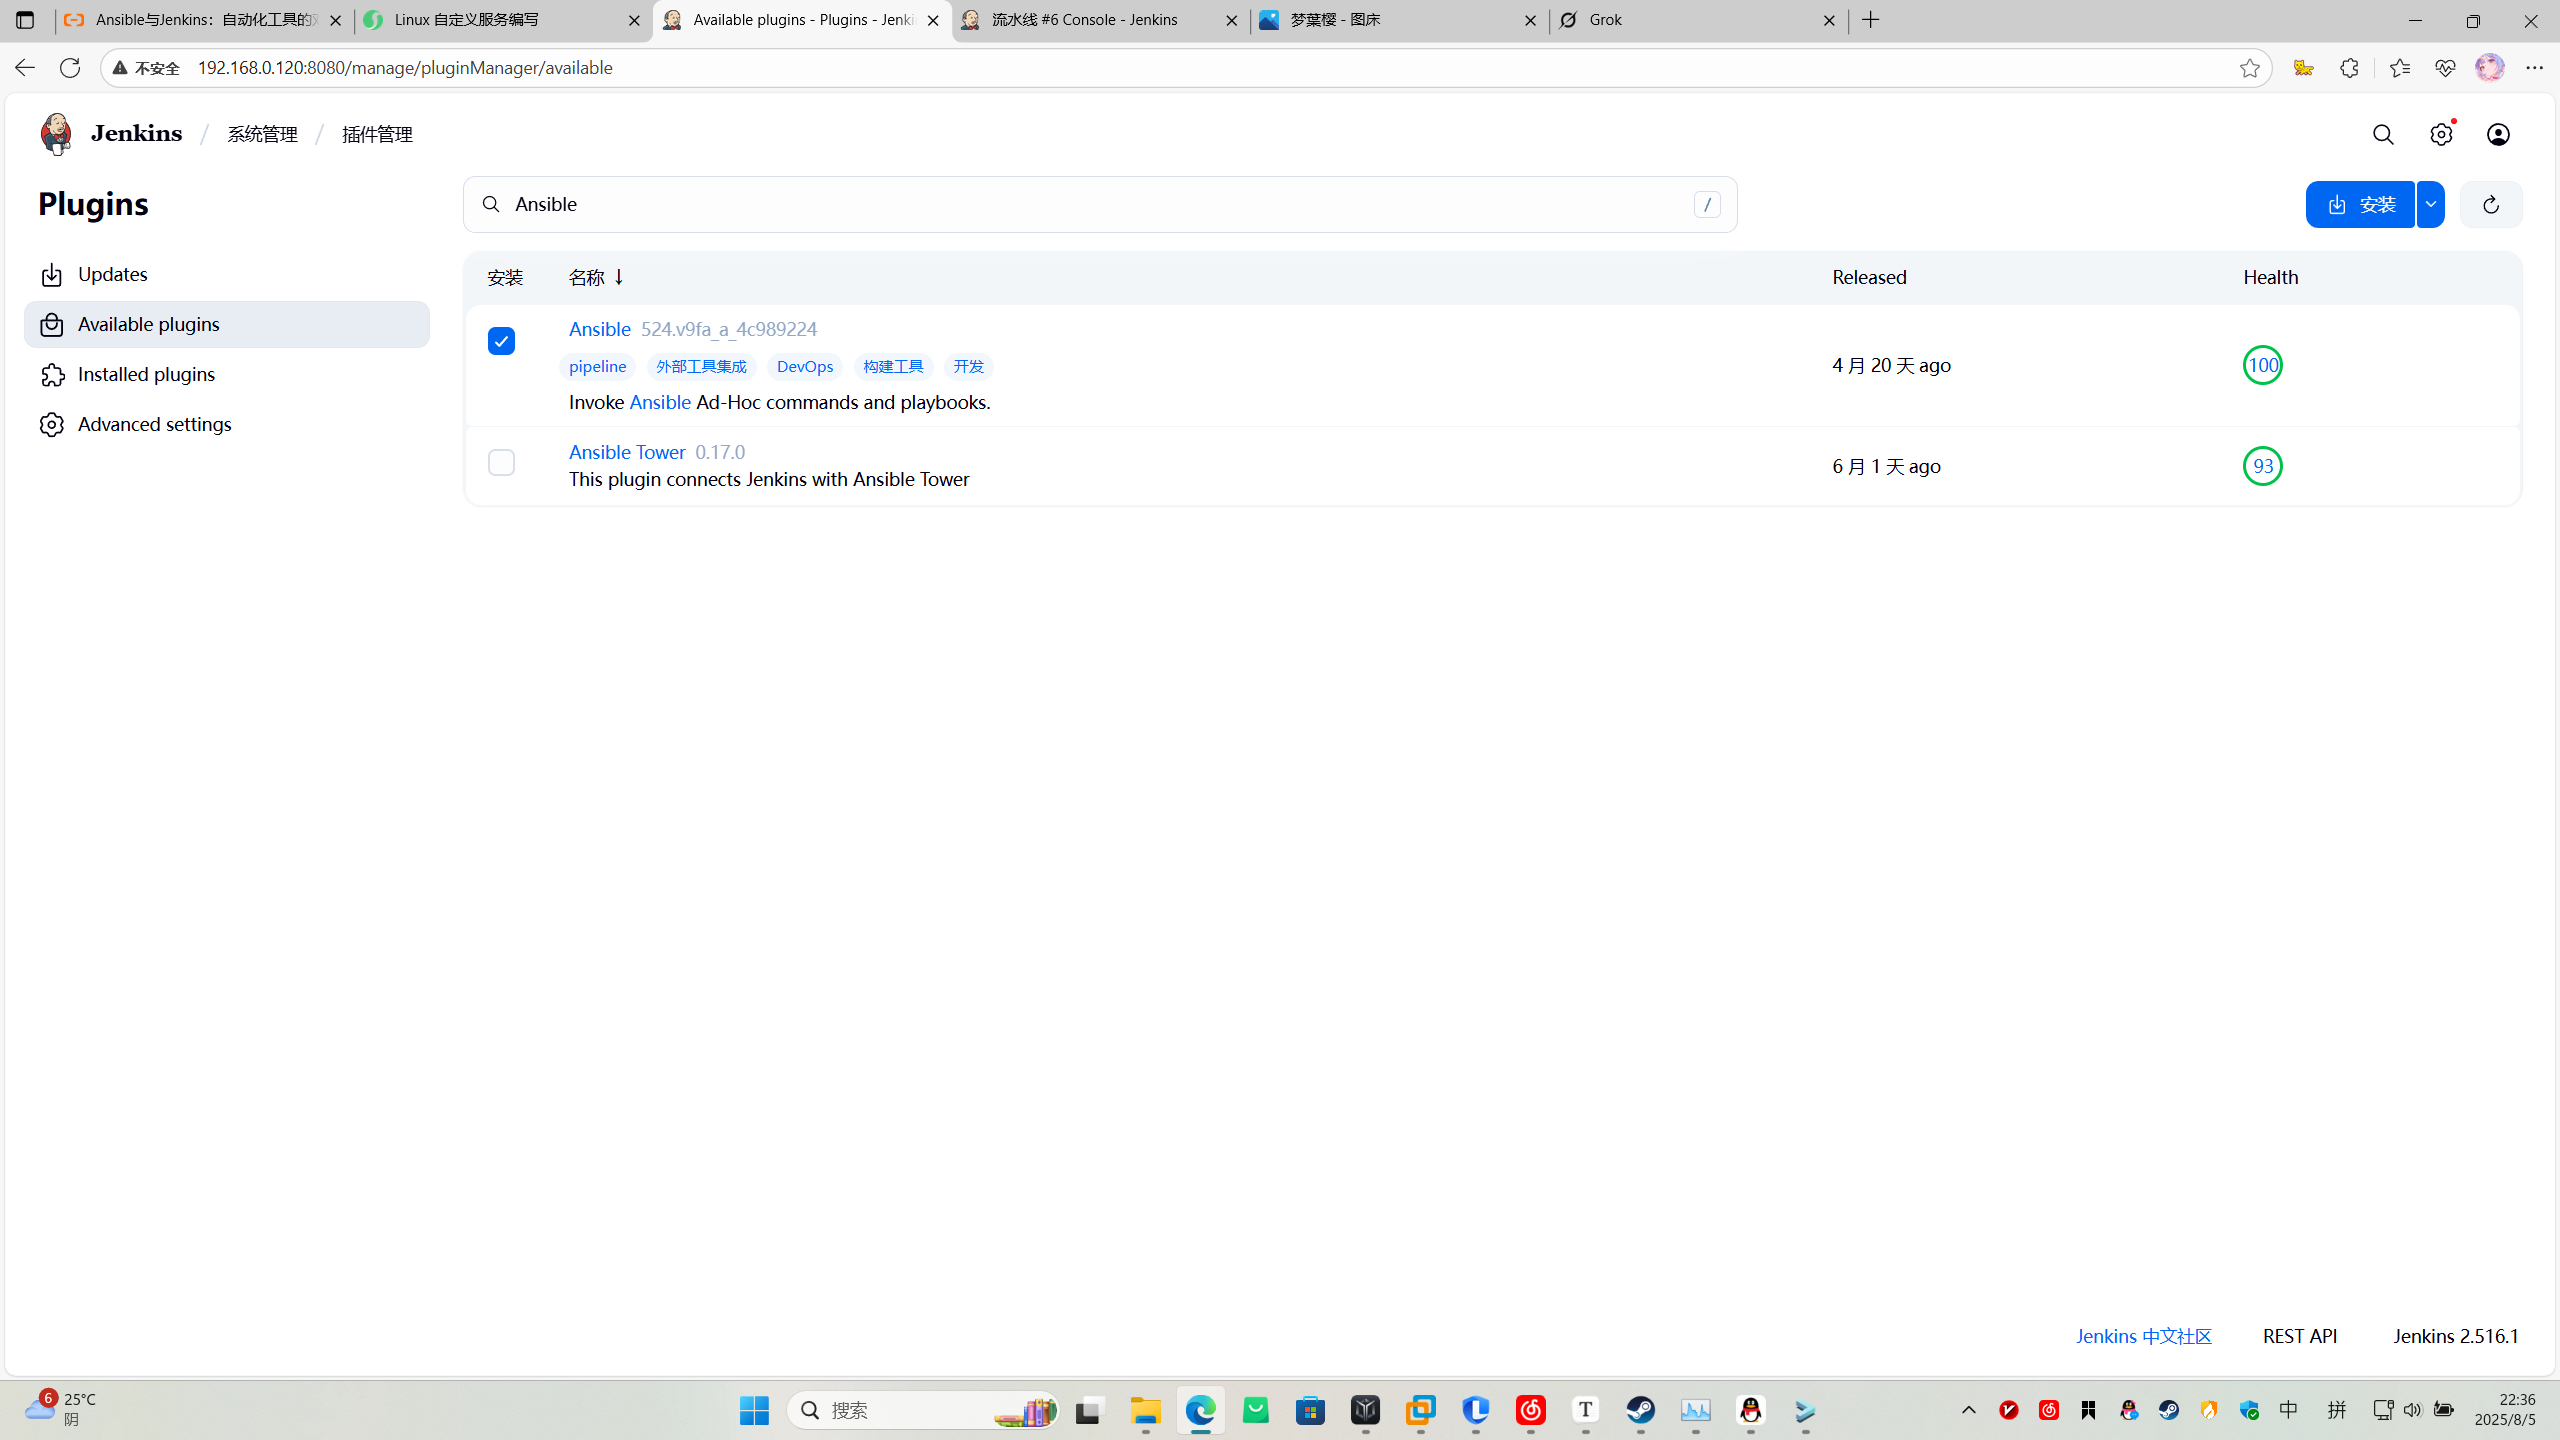
导航到插件管理选项页面。
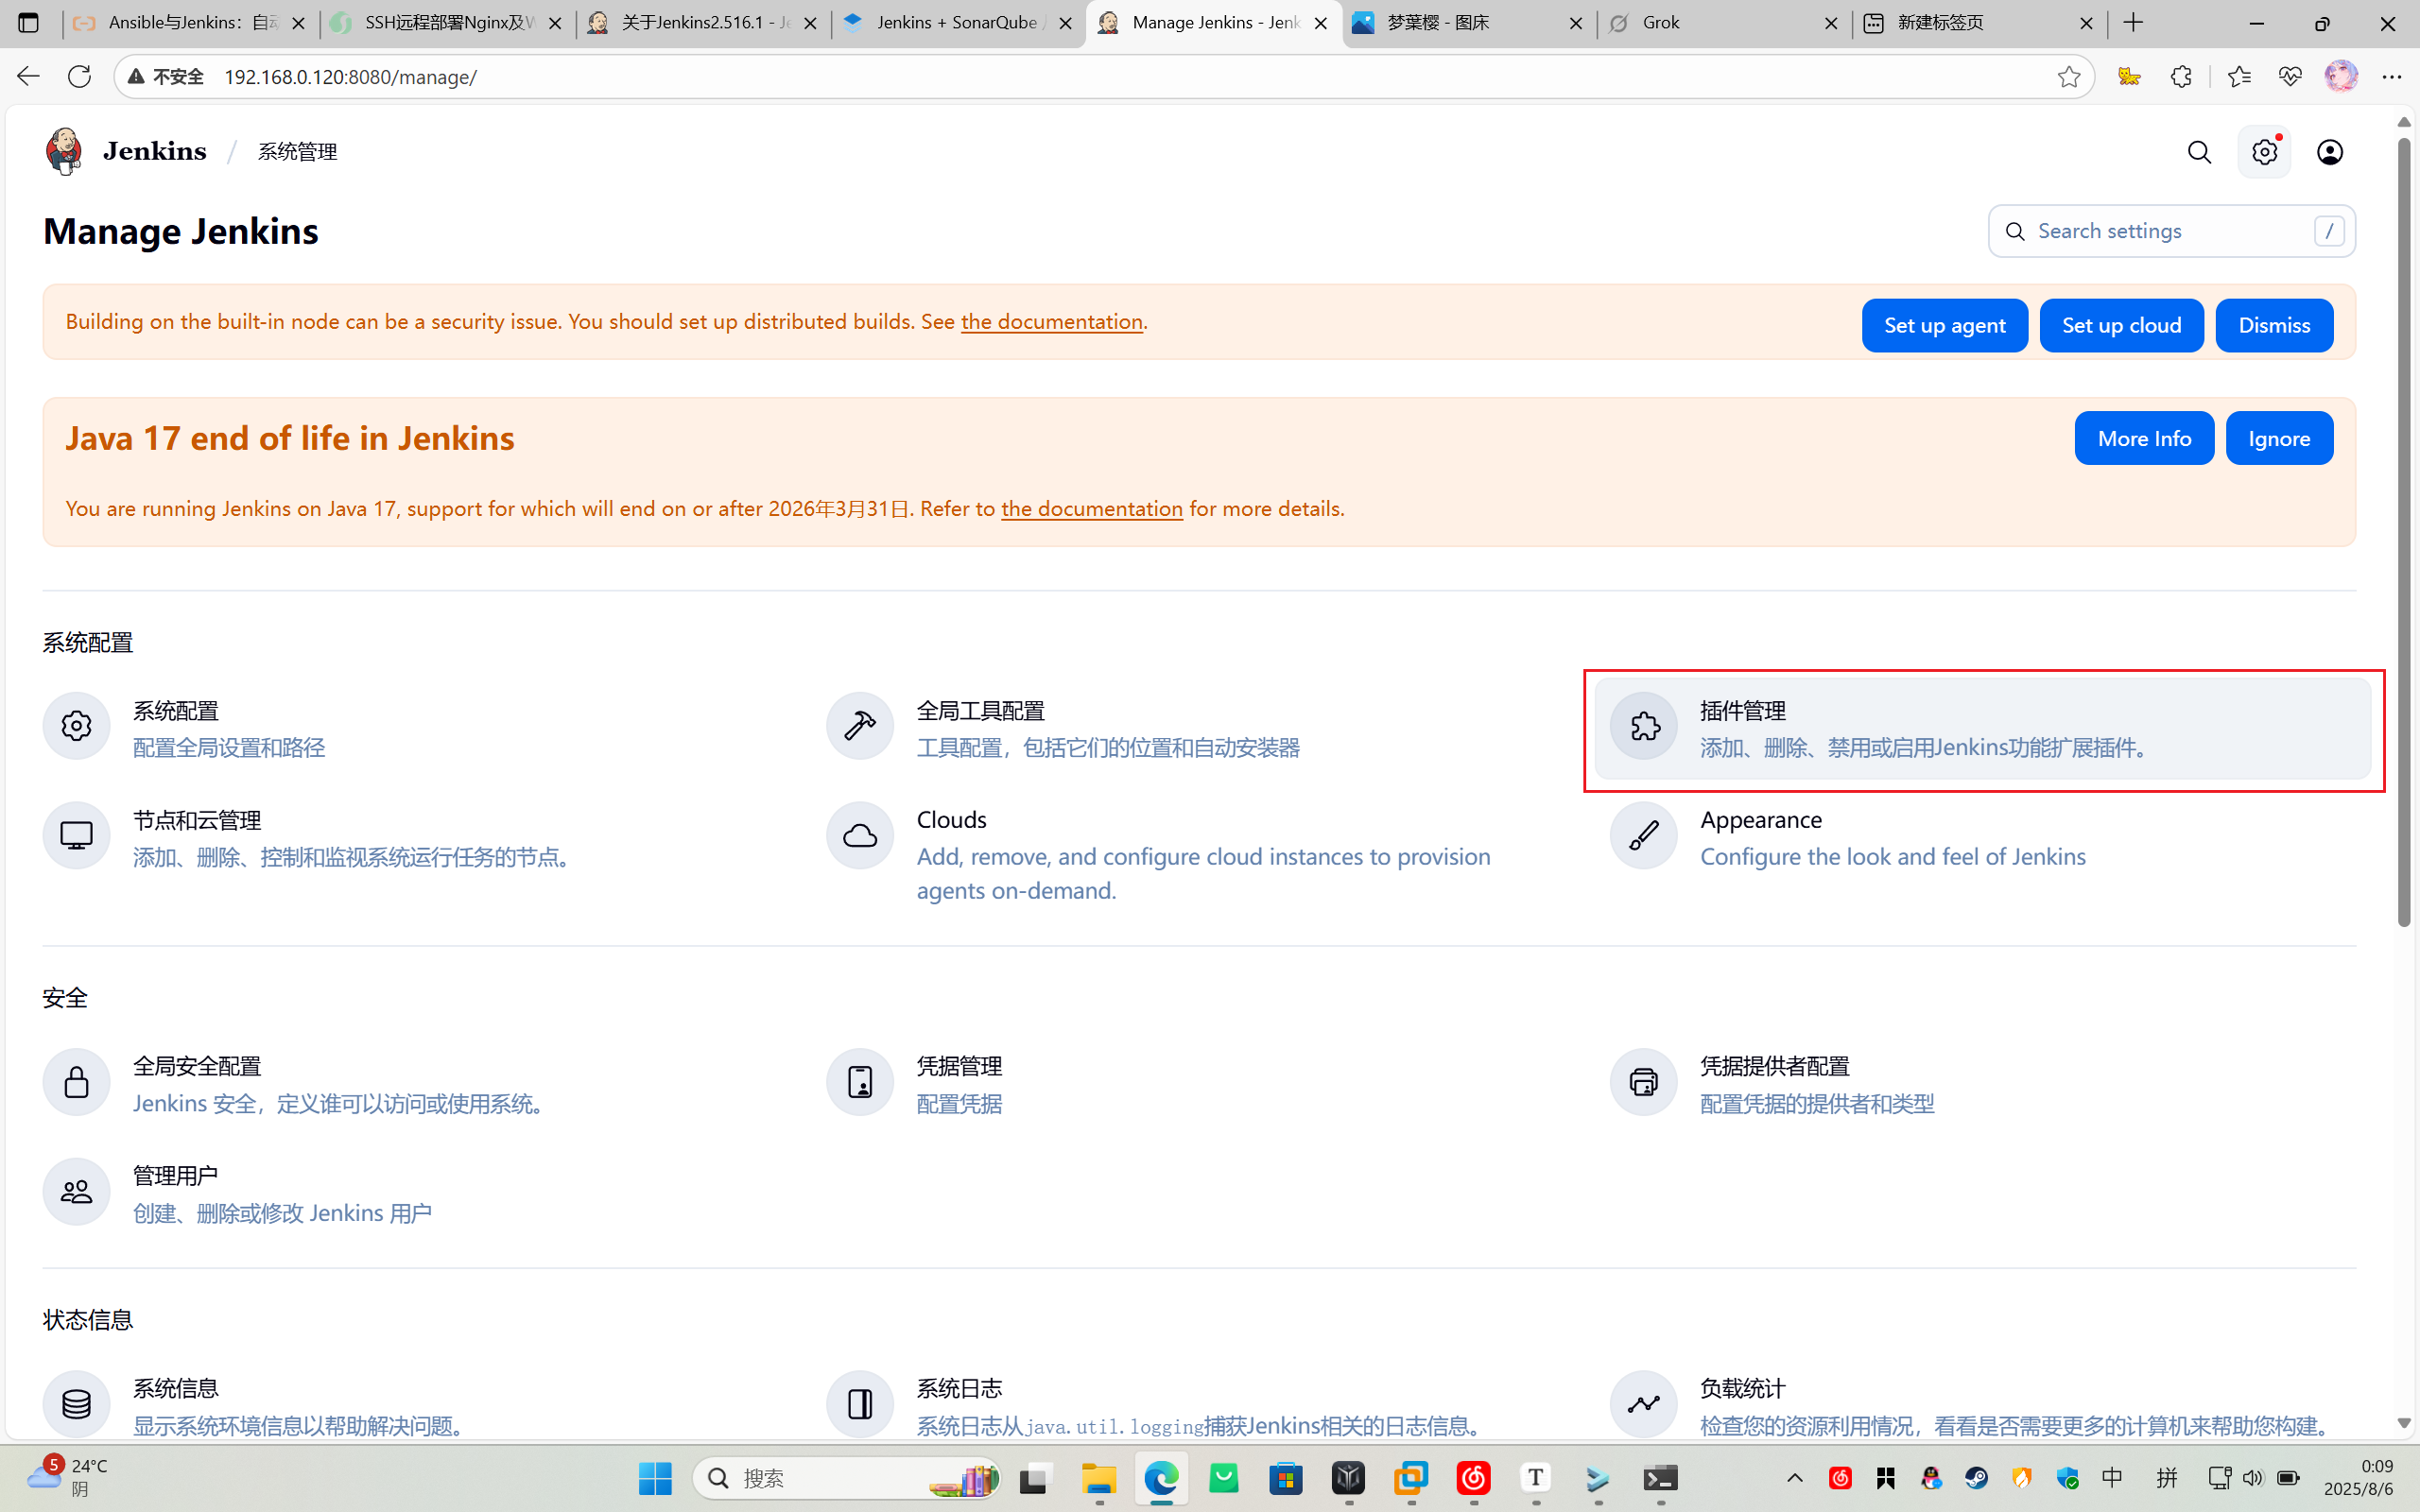
搜索并安装“Ansible”插件。
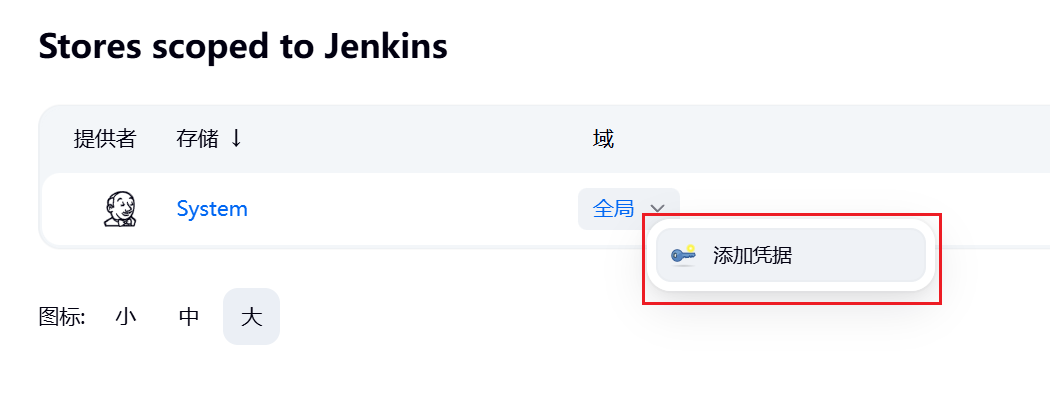
配置 Jenkins 凭据:
导航到凭据管理选项页面。
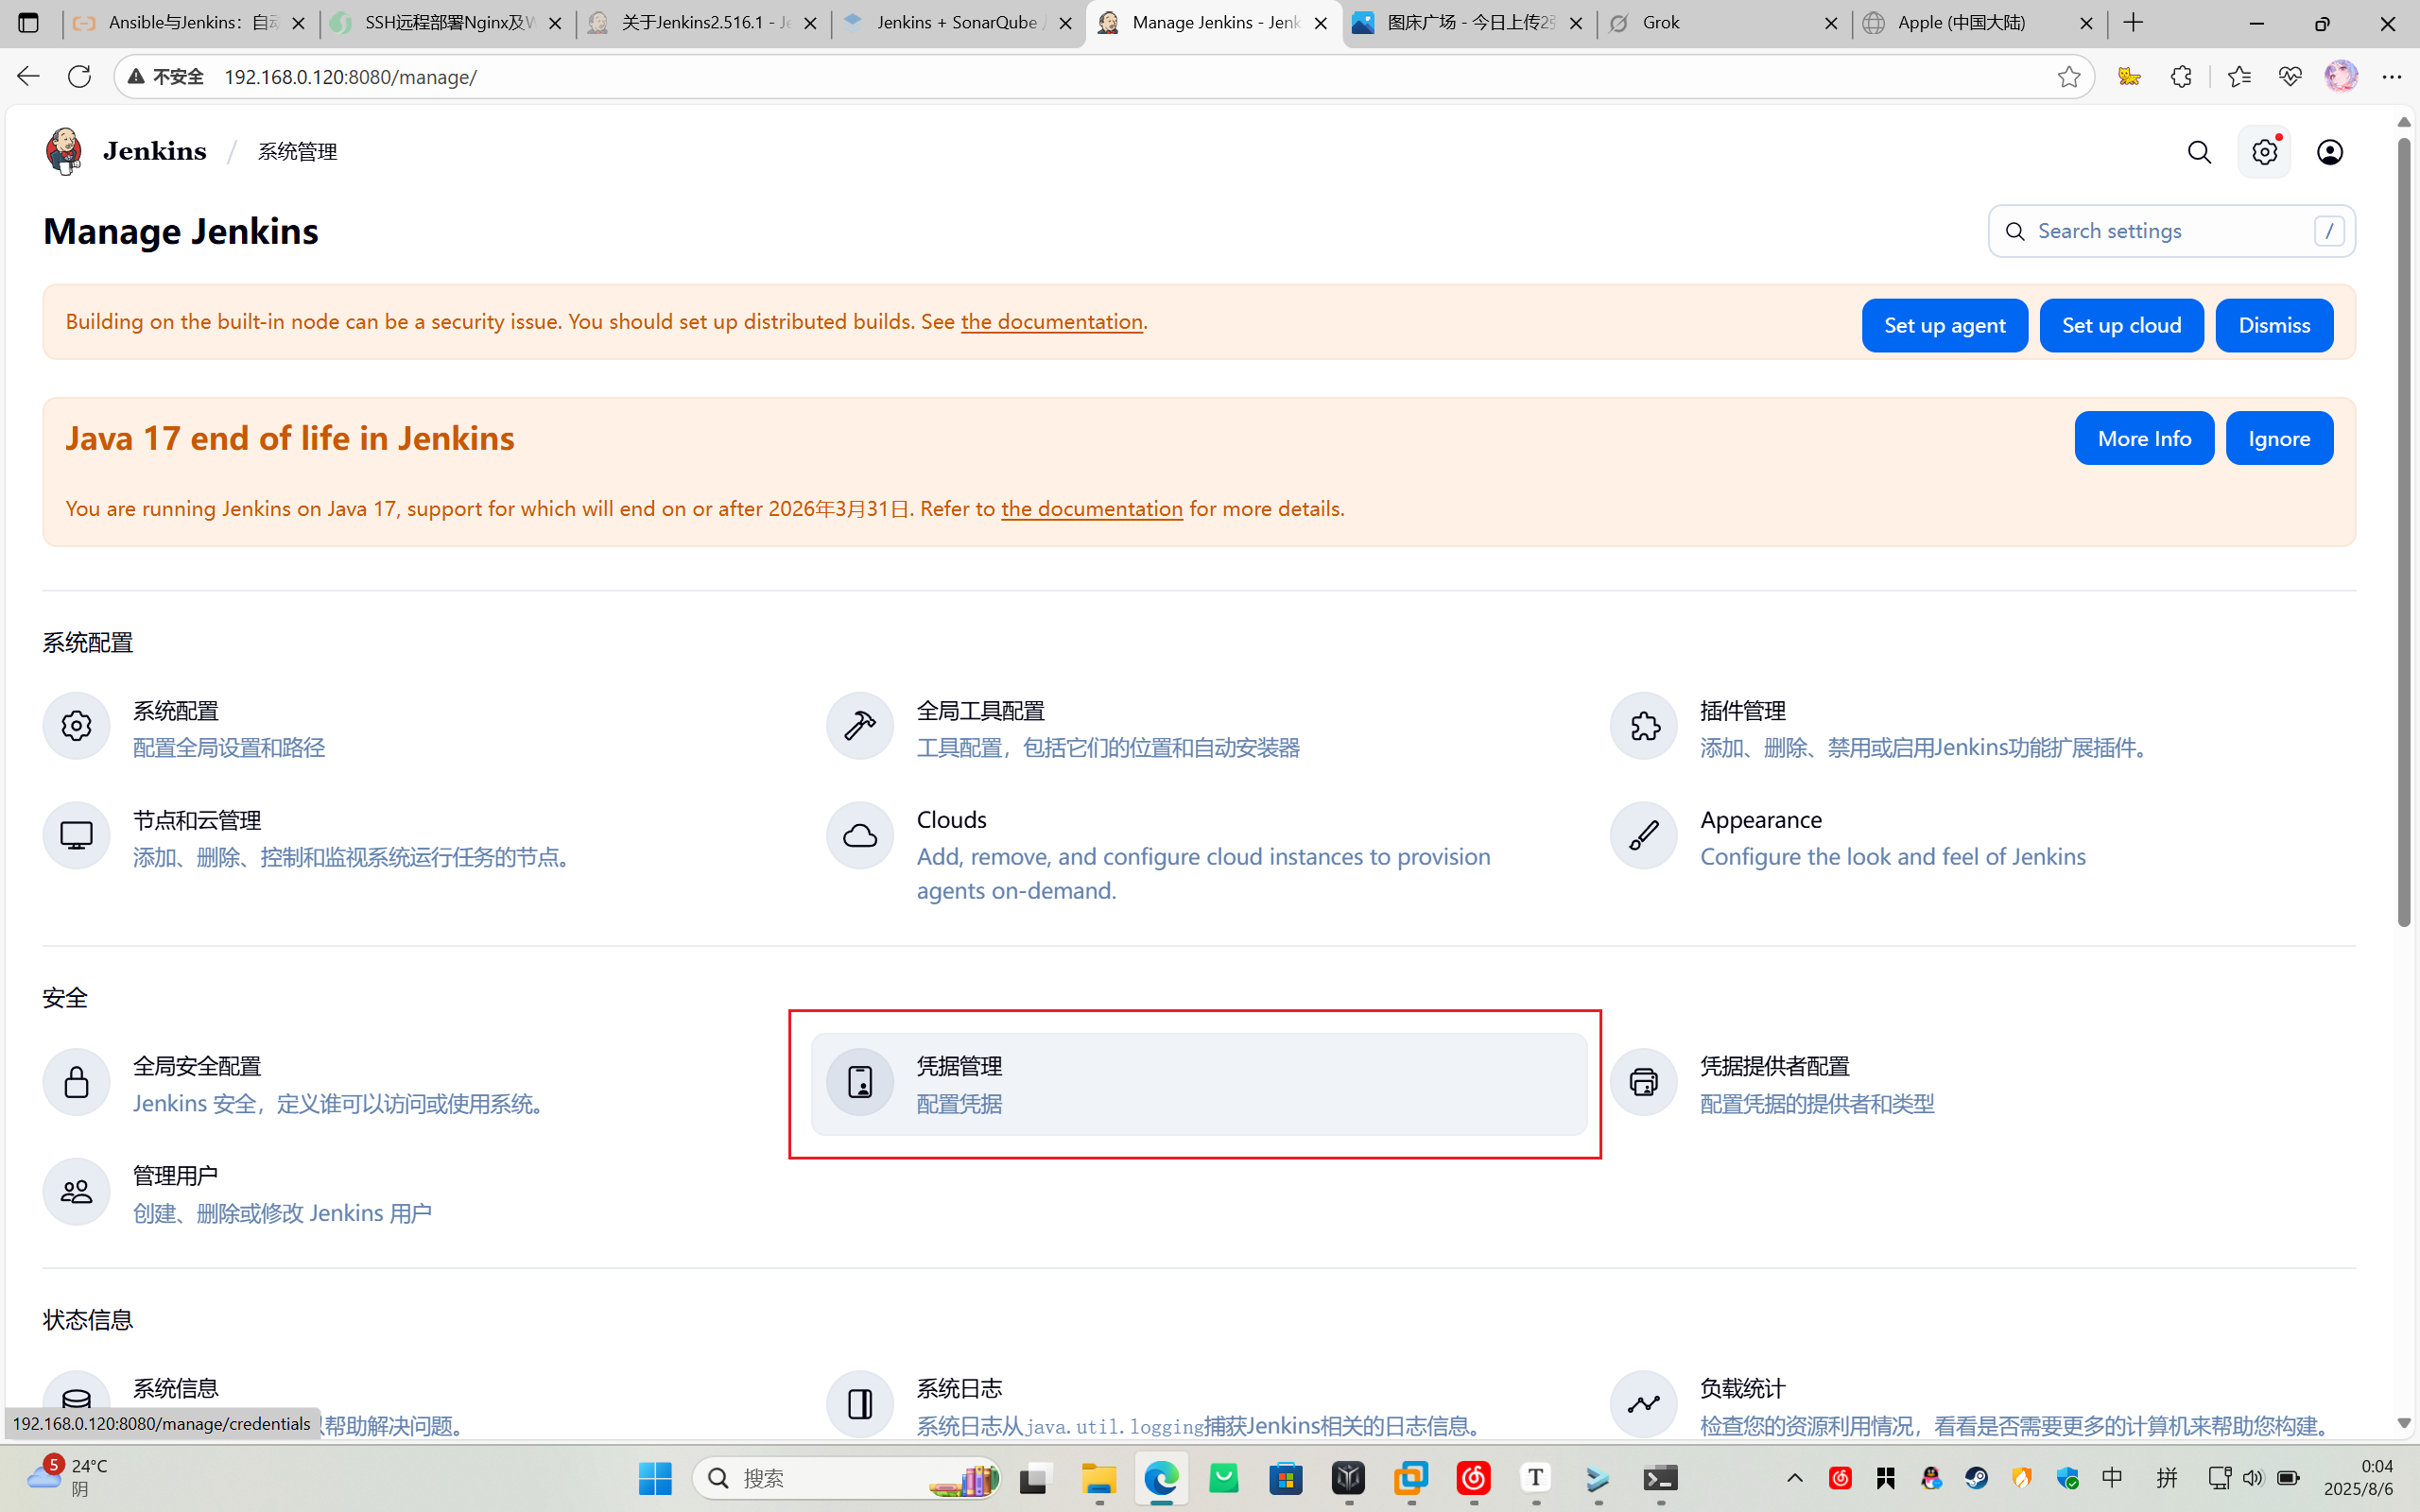
选择添加凭据
添加 SSH 密钥:
- Kind(类型): SSH Username with private key
- ID(唯一标识):
ansible-ssh-cred - Username(用户名):
root - Private Key(私钥): 粘贴
/key/ssh/id_rsa的内容。
第二部分:创建示例 Web 应用
创建一个简单的 Web 应用:
在 GitHub/Gitee 上创建一个公开仓库(例如
jenkins-warehouse)。添加一个简单的 HTML 文件(
index.html):<!DOCTYPE html> <html lang="zh-CN"> <head> <meta charset="UTF-8"> <meta name="viewport" content="width=device-width, initial-scale=1.0"> <title>Apple (中国大陆)</title> <style> /* 全局重置和基础样式 */ * { margin: 0; padding: 0; box-sizing: border-box; } body { font-family: "SF Pro Display", "SF Pro Icons", "Helvetica Neue", Helvetica, Arial, sans-serif; color: #1d1d1f; background-color: #f5f5f7; line-height: 1.47059; font-weight: 400; letter-spacing: -0.022em; } a { text-decoration: none; color: inherit; } /* 导航栏 */ .globalnav { background-color: rgba(0, 0, 0, 0.8); backdrop-filter: saturate(180%) blur(20px); position: fixed; top: 0; width: 100%; z-index: 9999; height: 44px; display: flex; justify-content: center; } .globalnav-container { width: 100%; max-width: 1024px; display: flex; justify-content: space-between; align-items: center; padding: 0 22px; } .globalnav-link { color: #f5f5f7; font-size: 12px; padding: 0 10px; opacity: 0.8; transition: opacity 0.3s; } .globalnav-link:hover { opacity: 1; } .globalnav-icon { width: 16px; height: 44px; background-repeat: no-repeat; background-position: center; } /* 主内容区域 */ .main { margin-top: 44px; } .hero { background-color: #000; color: #fff; text-align: center; padding-top: 60px; padding-bottom: 40px; } .hero-headline { font-size: 56px; font-weight: 600; line-height: 1.07143; letter-spacing: -0.005em; margin-bottom: 6px; } .hero-subhead { font-size: 28px; font-weight: 400; line-height: 1.10722; letter-spacing: 0.004em; margin-bottom: 18px; } .hero-links { font-size: 21px; line-height: 1.381; letter-spacing: 0.011em; } .hero-link { color: #2997ff; margin: 0 20px; } .hero-image { margin-top: 40px; } .hero-image img { max-width: 100%; height: auto; } /* 产品网格 */ .products { display: grid; grid-template-columns: repeat(2, 1fr); gap: 12px; padding: 12px; max-width: 1024px; margin: 0 auto; } .product-tile { background-color: #fff; border-radius: 18px; overflow: hidden; text-align: center; padding: 40px 20px; } .product-name { font-size: 40px; font-weight: 600; line-height: 1.1; letter-spacing: 0em; margin-bottom: 6px; } .product-description { font-size: 21px; line-height: 1.381; letter-spacing: 0.011em; margin-bottom: 18px; } .product-links { font-size: 17px; line-height: 1.47059; letter-spacing: -0.022em; } .product-link { color: #0066cc; margin: 0 11px; } /* 页脚 */ .footer { background-color: #f5f5f7; color: #86868b; font-size: 12px; line-height: 1.33337; padding: 20px 0; } .footer-container { max-width: 1024px; margin: 0 auto; padding: 0 22px; } .footer-legal { border-top: 1px solid #d2d2d7; padding-top: 20px; margin-top: 20px; } </style> </head> <body> <!-- 导航栏 --> <nav class="globalnav"> <div class="globalnav-container"> <a href="#" class="globalnav-icon"> <svg xmlns="http://www.w3.org/2000/svg" width="16" height="44" viewBox="0 0 16 44"> <path d="m13.0729 17.6825a3.61 3.61 0 0 0 -1.7248 3.0365 3.5132 3.5132 0 0 0 2.1379 3.2223 8.394 8.394 0 0 1 -1.0948 2.2618c-.6816.9812-1.3943 1.9623-2.4787 1.9623s-1.3633-.63-2.613-.63c-1.2187 0-1.6525.6507-2.644.6507s-1.6834-.9089-2.4787-2.0243a9.7842 9.7842 0 0 1 -1.6628-5.2776c0-3.0984 2.014-4.7405 3.9969-4.7405 1.0535 0 1.9314.6919 2.5924.6919.63 0 1.6112-.7333 2.8092-.7333a3.7579 3.7579 0 0 1 3.1604 1.5802zm-3.7284-2.8918a3.5615 3.5615 0 0 0 .8469-2.22 1.5353 1.5353 0 0 0 -.031-.32 3.5686 3.5686 0 0 0 -2.3445 1.2084 3.4629 3.4629 0 0 0 -.8779 2.1585 1.419 1.419 0 0 0 .031.2892 1.19 1.19 0 0 0 .2169.0207 3.0935 3.0935 0 0 0 2.1586-1.1368z" fill="#f5f5f7"/> </svg> </a> <a href="#" class="globalnav-link">商店</a> <a href="#" class="globalnav-link">Mac</a> <a href="#" class="globalnav-link">iPad</a> <a href="#" class="globalnav-link">iPhone</a> <a href="#" class="globalnav-link">Watch</a> <a href="#" class="globalnav-link">AirPods</a> <a href="#" class="globalnav-link">家居</a> <a href="#" class="globalnav-link">娱乐</a> <a href="#" class="globalnav-link">配件</a> <a href="#" class="globalnav-link">技术支持</a> </div> </nav> <!-- 主内容区域 --> <main class="main"> <!-- 主推产品 --> <section class="hero"> <h2 class="hero-headline">iPhone 15 Pro</h2> <h3 class="hero-subhead">钛金属。A17 Pro芯片。Action按钮。</h3> <div class="hero-links"> <a href="#" class="hero-link">了解更多 ></a> <a href="#" class="hero-link">购买 ></a> </div> <div class="hero-image"> <img src="https://www.apple.com/v/home/be/images/heroes/iphone-15-pro/hero_iphone15pro__i70z9oz3hj2i_large.jpg" alt="iPhone 15 Pro"> </div> </section> <!-- 产品网格 --> <div class="products"> <div class="product-tile"> <h3 class="product-name">iPhone 15</h3> <p class="product-description">新颜色。强力相机。USB-C。</p> <div class="product-links"> <a href="#" class="product-link">了解更多 ></a> <a href="#" class="product-link">购买 ></a> </div> </div> <div class="product-tile"> <h3 class="product-name">Apple Watch Series 9</h3> <p class="product-description">更明亮。更强大。</p> <div class="product-links"> <a href="#" class="product-link">了解更多 ></a> <a href="#" class="product-link">购买 ></a> </div> </div> <div class="product-tile"> <h3 class="product-name">MacBook Pro</h3> <p class="product-description">搭载M3芯片。</p> <div class="product-links"> <a href="#" class="product-link">了解更多 ></a> <a href="#" class="product-link">购买 ></a> </div> </div> <div class="product-tile"> <h3 class="product-name">iPad Pro</h3> <p class="product-description">搭载M2芯片。</p> <div class="product-links"> <a href="#" class="product-link">了解更多 ></a> <a href="#" class="product-link">购买 ></a> </div> </div> <div class="product-tile"> <h3 class="product-name">AirPods Pro</h3> <p class="product-description">自适应音频。全新体验。</p> <div class="product-links"> <a href="#" class="product-link">了解更多 ></a> <a href="#" class="product-link">购买 ></a> </div> </div> <div class="product-tile"> <h3 class="product-name">HomePod mini</h3> <p class="product-description">震撼音效。智能家居。</p> <div class="product-links"> <a href="#" class="product-link">了解更多 ></a> <a href="#" class="product-link">购买 ></a> </div> </div> </div> </main> <!-- 页脚 --> <footer class="footer"> <div class="footer-container"> <p>1. 实际折抵金额取决于设备的状况、配置和推出年份。</p> <p>2. 需要订阅 Apple TV+。</p> <p>* 所列数据来自 Apple 于 2023 年 10 月进行的测试,使用试生产的 iPhone 15、iPhone 15 Plus、iPhone 15 Pro 和 iPhone 15 Pro Max 机型及软件,并搭配相应发售时的系统软件。</p> <div class="footer-legal"> <p>更多选购方式:<a href="#">查找你附近的 Apple Store 零售店</a>及<a href="#">更多门店</a>,或者致电 400-666-8800。</p> <p>Copyright © 2023 Apple Inc. 保留所有权利。</p> <p>隐私政策 | 使用条款 | 销售政策 | 法律信息 | 网站地图</p> </div> </div> </footer> </body> </html>提交并推送到 GitHub/Gitee。
在目标服务器上安装 Nginx:
确保目标服务器(
192.168.1.100)已安装 Nginx:ssh root@192.168.1.100 sudo apt update sudo apt install nginx -y sudo systemctl enable nginx sudo systemctl start nginx
第三部分:编写 Ansible Playbook
创建 Ansible 项目目录:
mkdir -p /file/ansible-deployment
cd /file/ansible-deployment
编写 Playbook:
创建
deploy.yml:--- - name: 部署 Web 应用 hosts: webservers become: yes tasks: - name: 确保 Nginx 已安装 apt: name: nginx state: present update_cache: yes - name: 确保 Git 已安装 apt: name: git state: present update_cache: yes become: yes - name: 克隆或更新 Git 仓库 git: repo: 'https://gitee.com/ye-ziheng123/jenkins-warehouse.git' dest: /var/www/html/my-web-app version: master force: yes - name: 复制 index.html 到 Nginx 根目录 copy: src: /var/www/html/my-web-app/index.html dest: /var/www/html/index.html remote_src: yes mode: '0644' - name: 确保 Nginx 正在运行 service: name: nginx state: restarted enabled: yes
测试 Playbook:
ansible-playbook -i /etc/ansible/hosts /file/deploy.yml- 验证:访问
http://192.168.0.121,应看到“你好,世界!”页面。
- 验证:访问
第四部分:配置 Jenkins 自动化部署
创建 Jenkins 流水线任务:
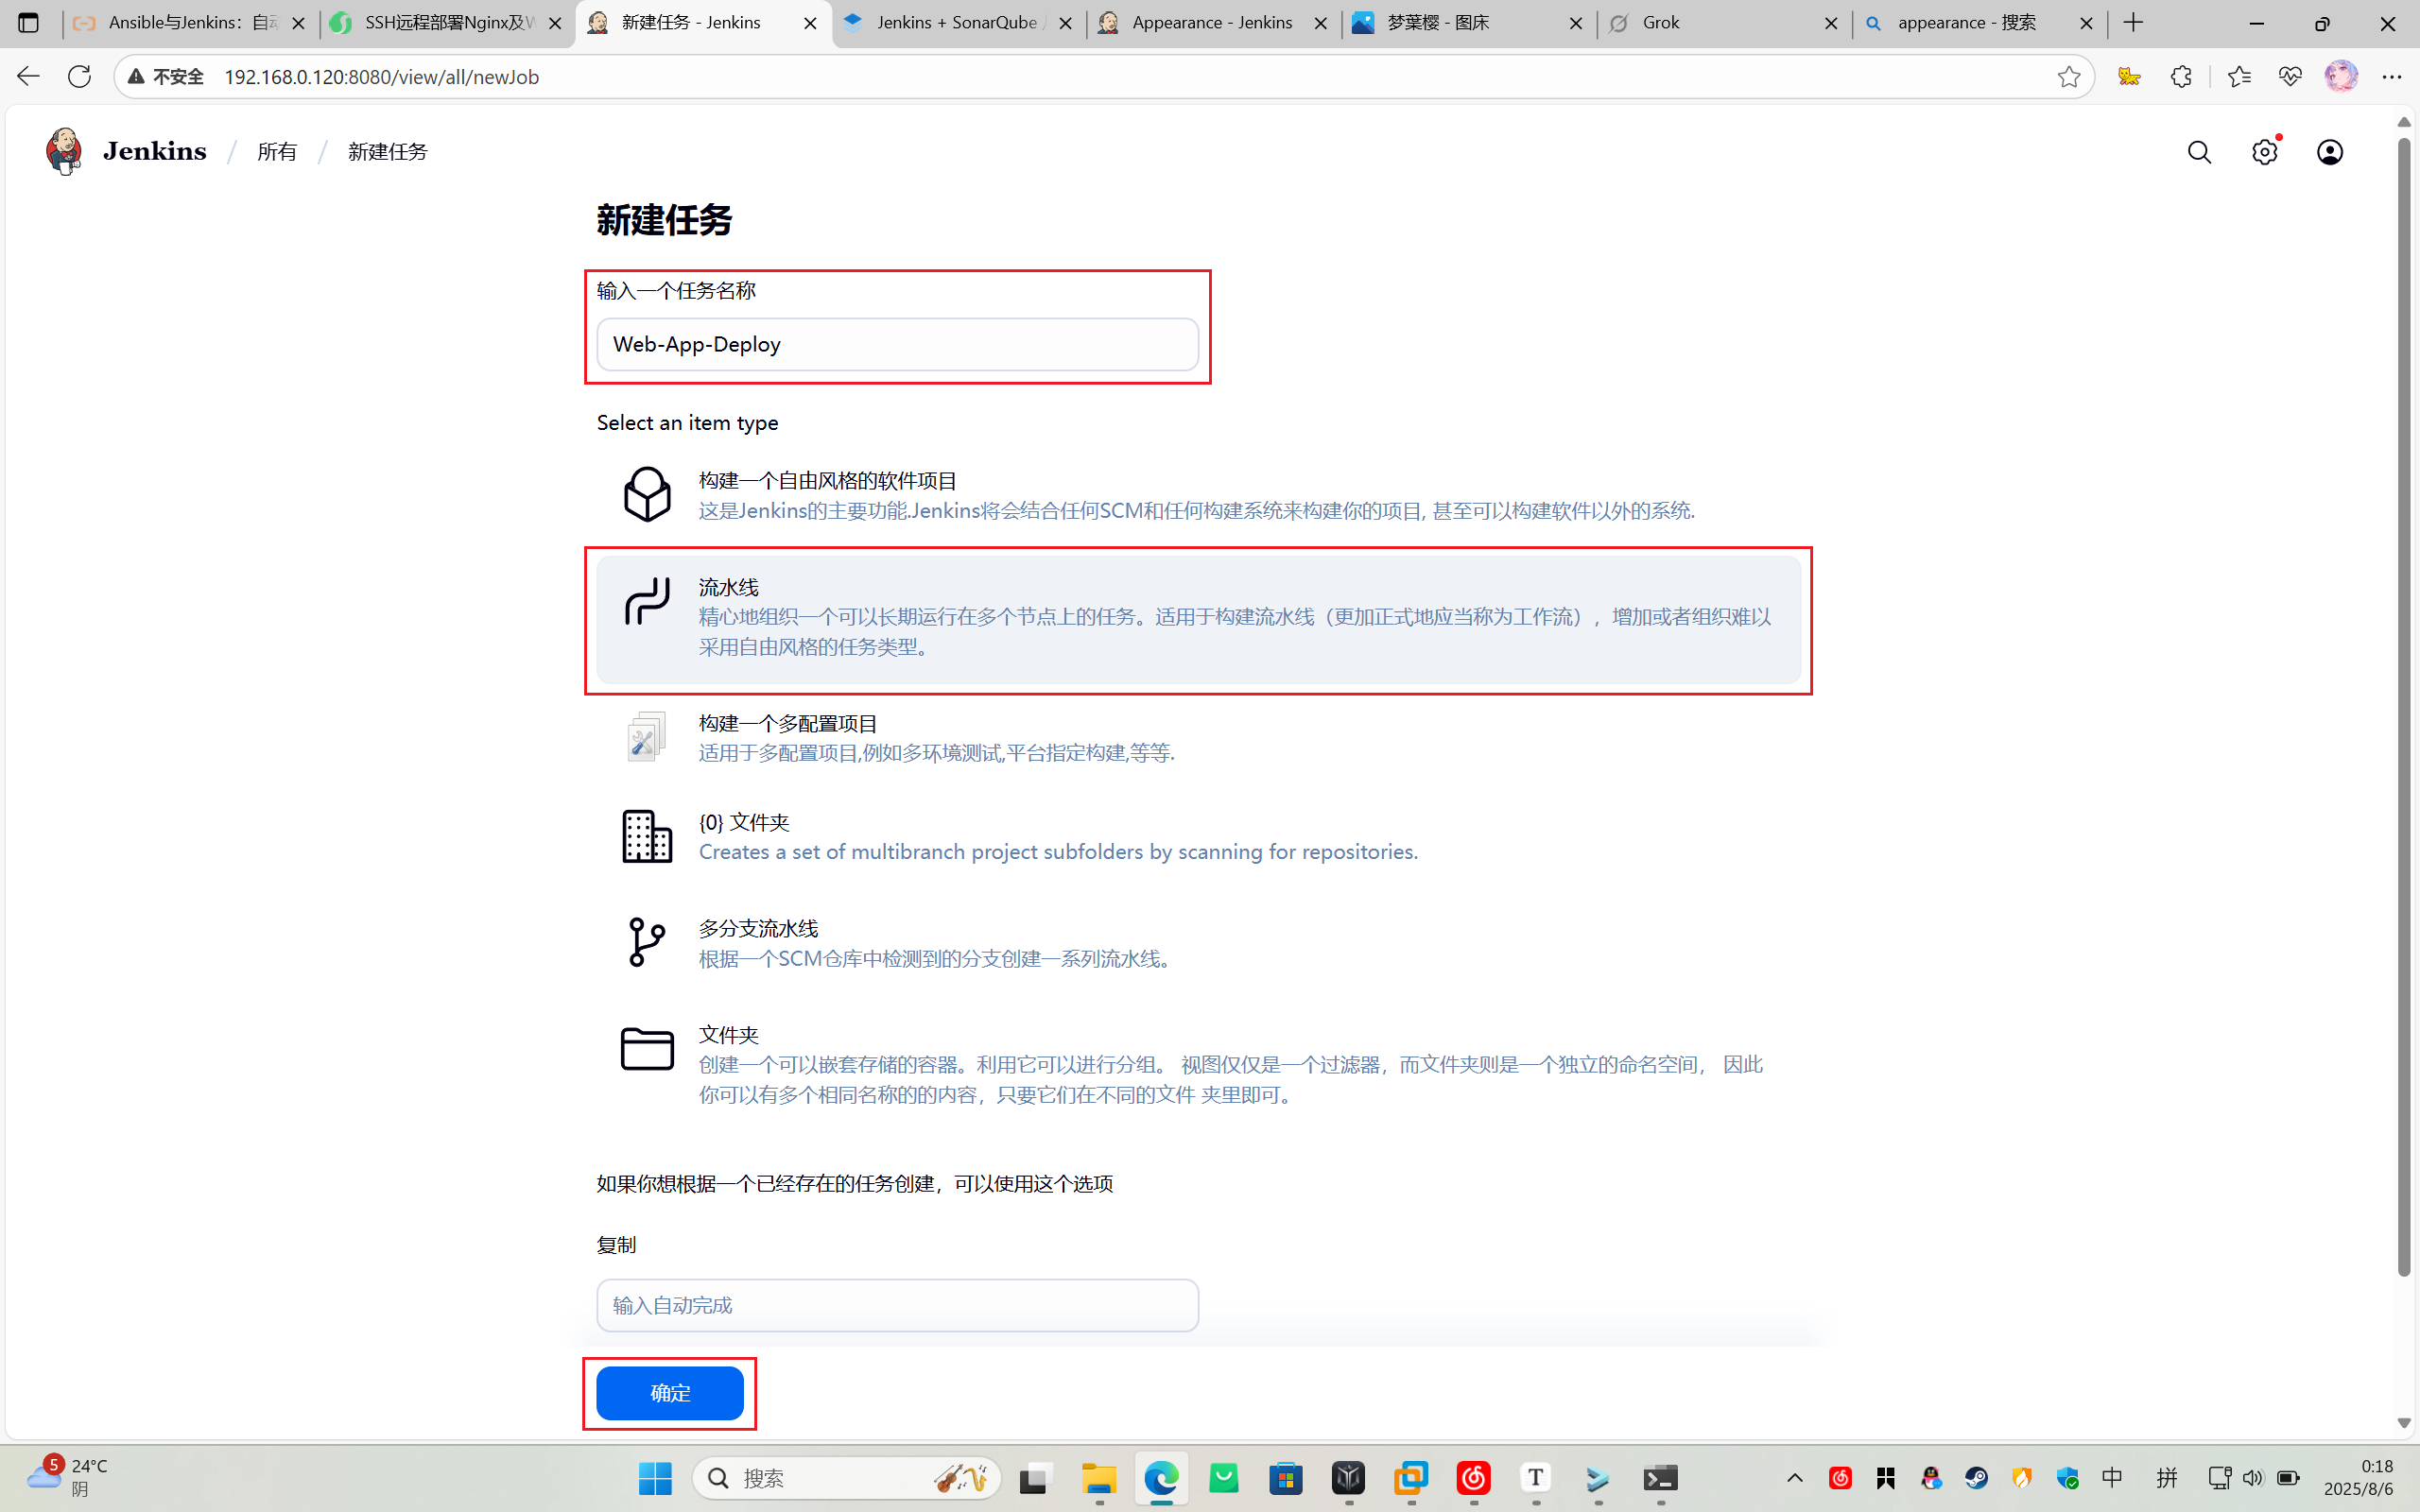
在 Jenkins 仪表板,点击新建任务选项,命名为
Web-App-Deploy。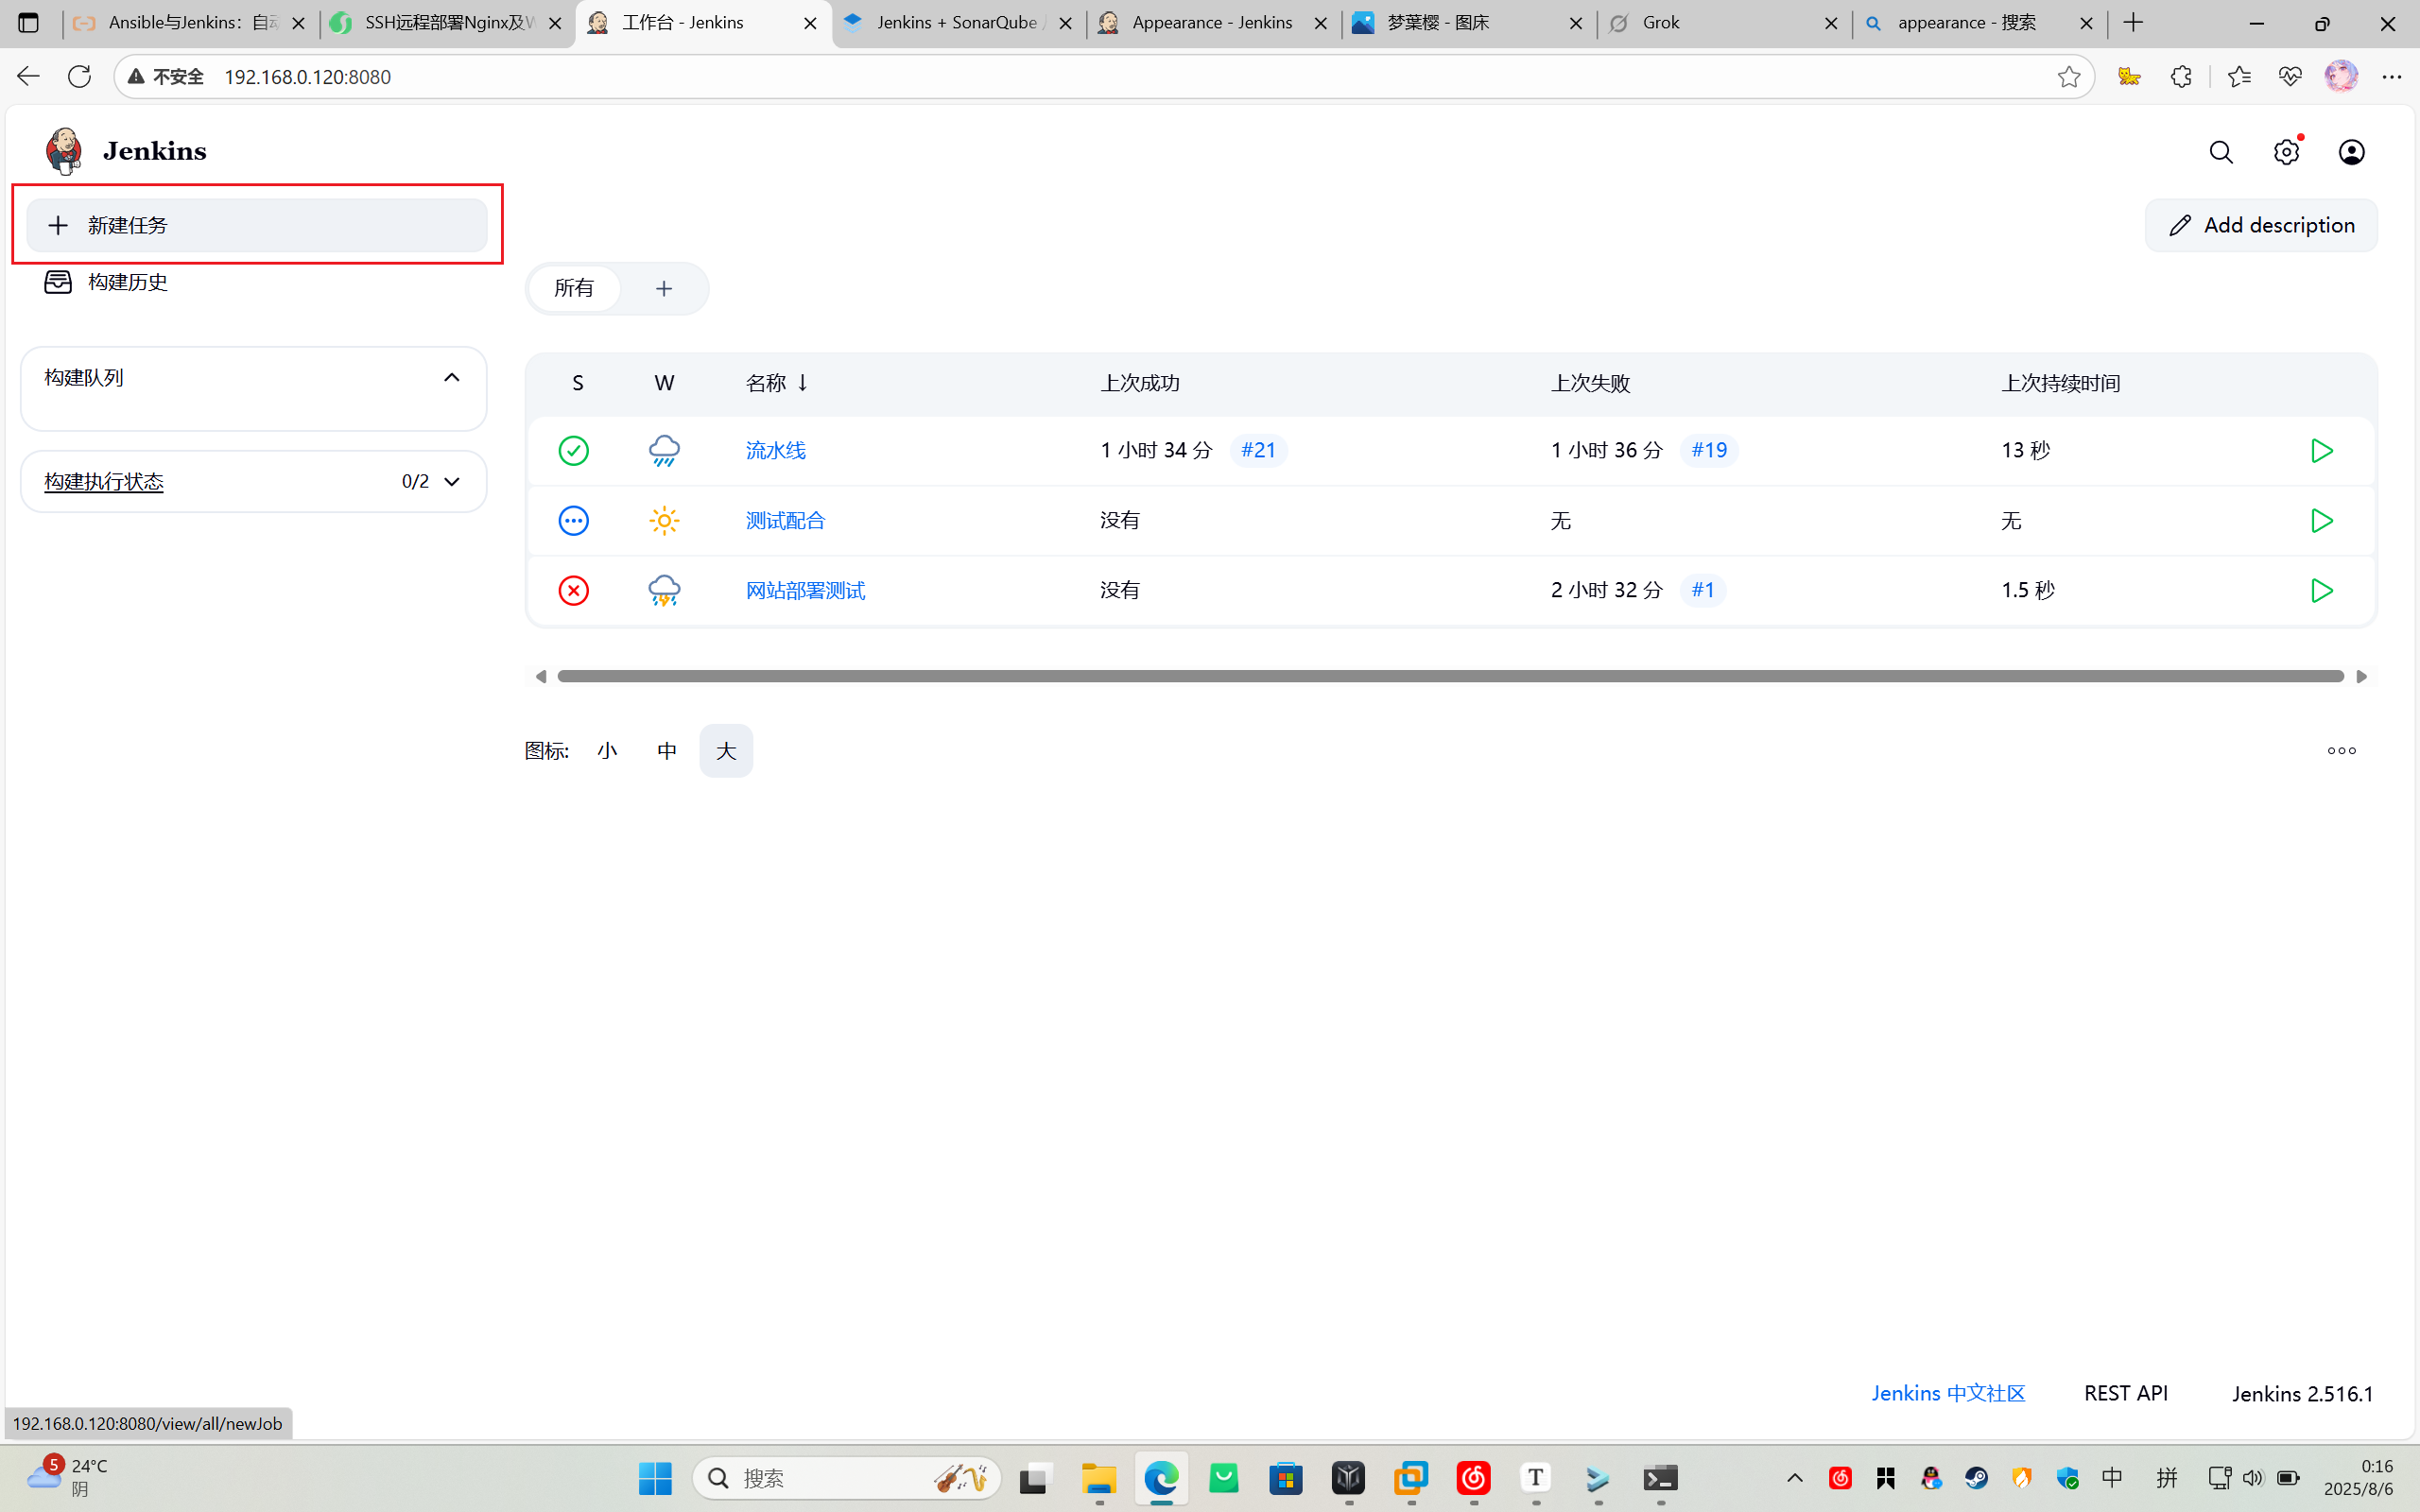
选择“流水线”部分。
在“流水线”部分,选择“Pipeline script”并输入以下脚本:
pipeline {
    agent any
    stages {
        stage('Checkout Code') {
            steps {
                git branch: 'master', url: 'https://gitee.com/ye-ziheng123/jenkins-warehouse.git'
            }
        }
        stage('Deploy with Ansible') {
            steps {
                ansiblePlaybook(
                    playbook: '/file/deploy.yml',
                    inventory: "/etc/ansible/hosts",
                    credentialsId: 'ansible-ssh-cred',
                    colorized: true
                )
            }
        }
    }
}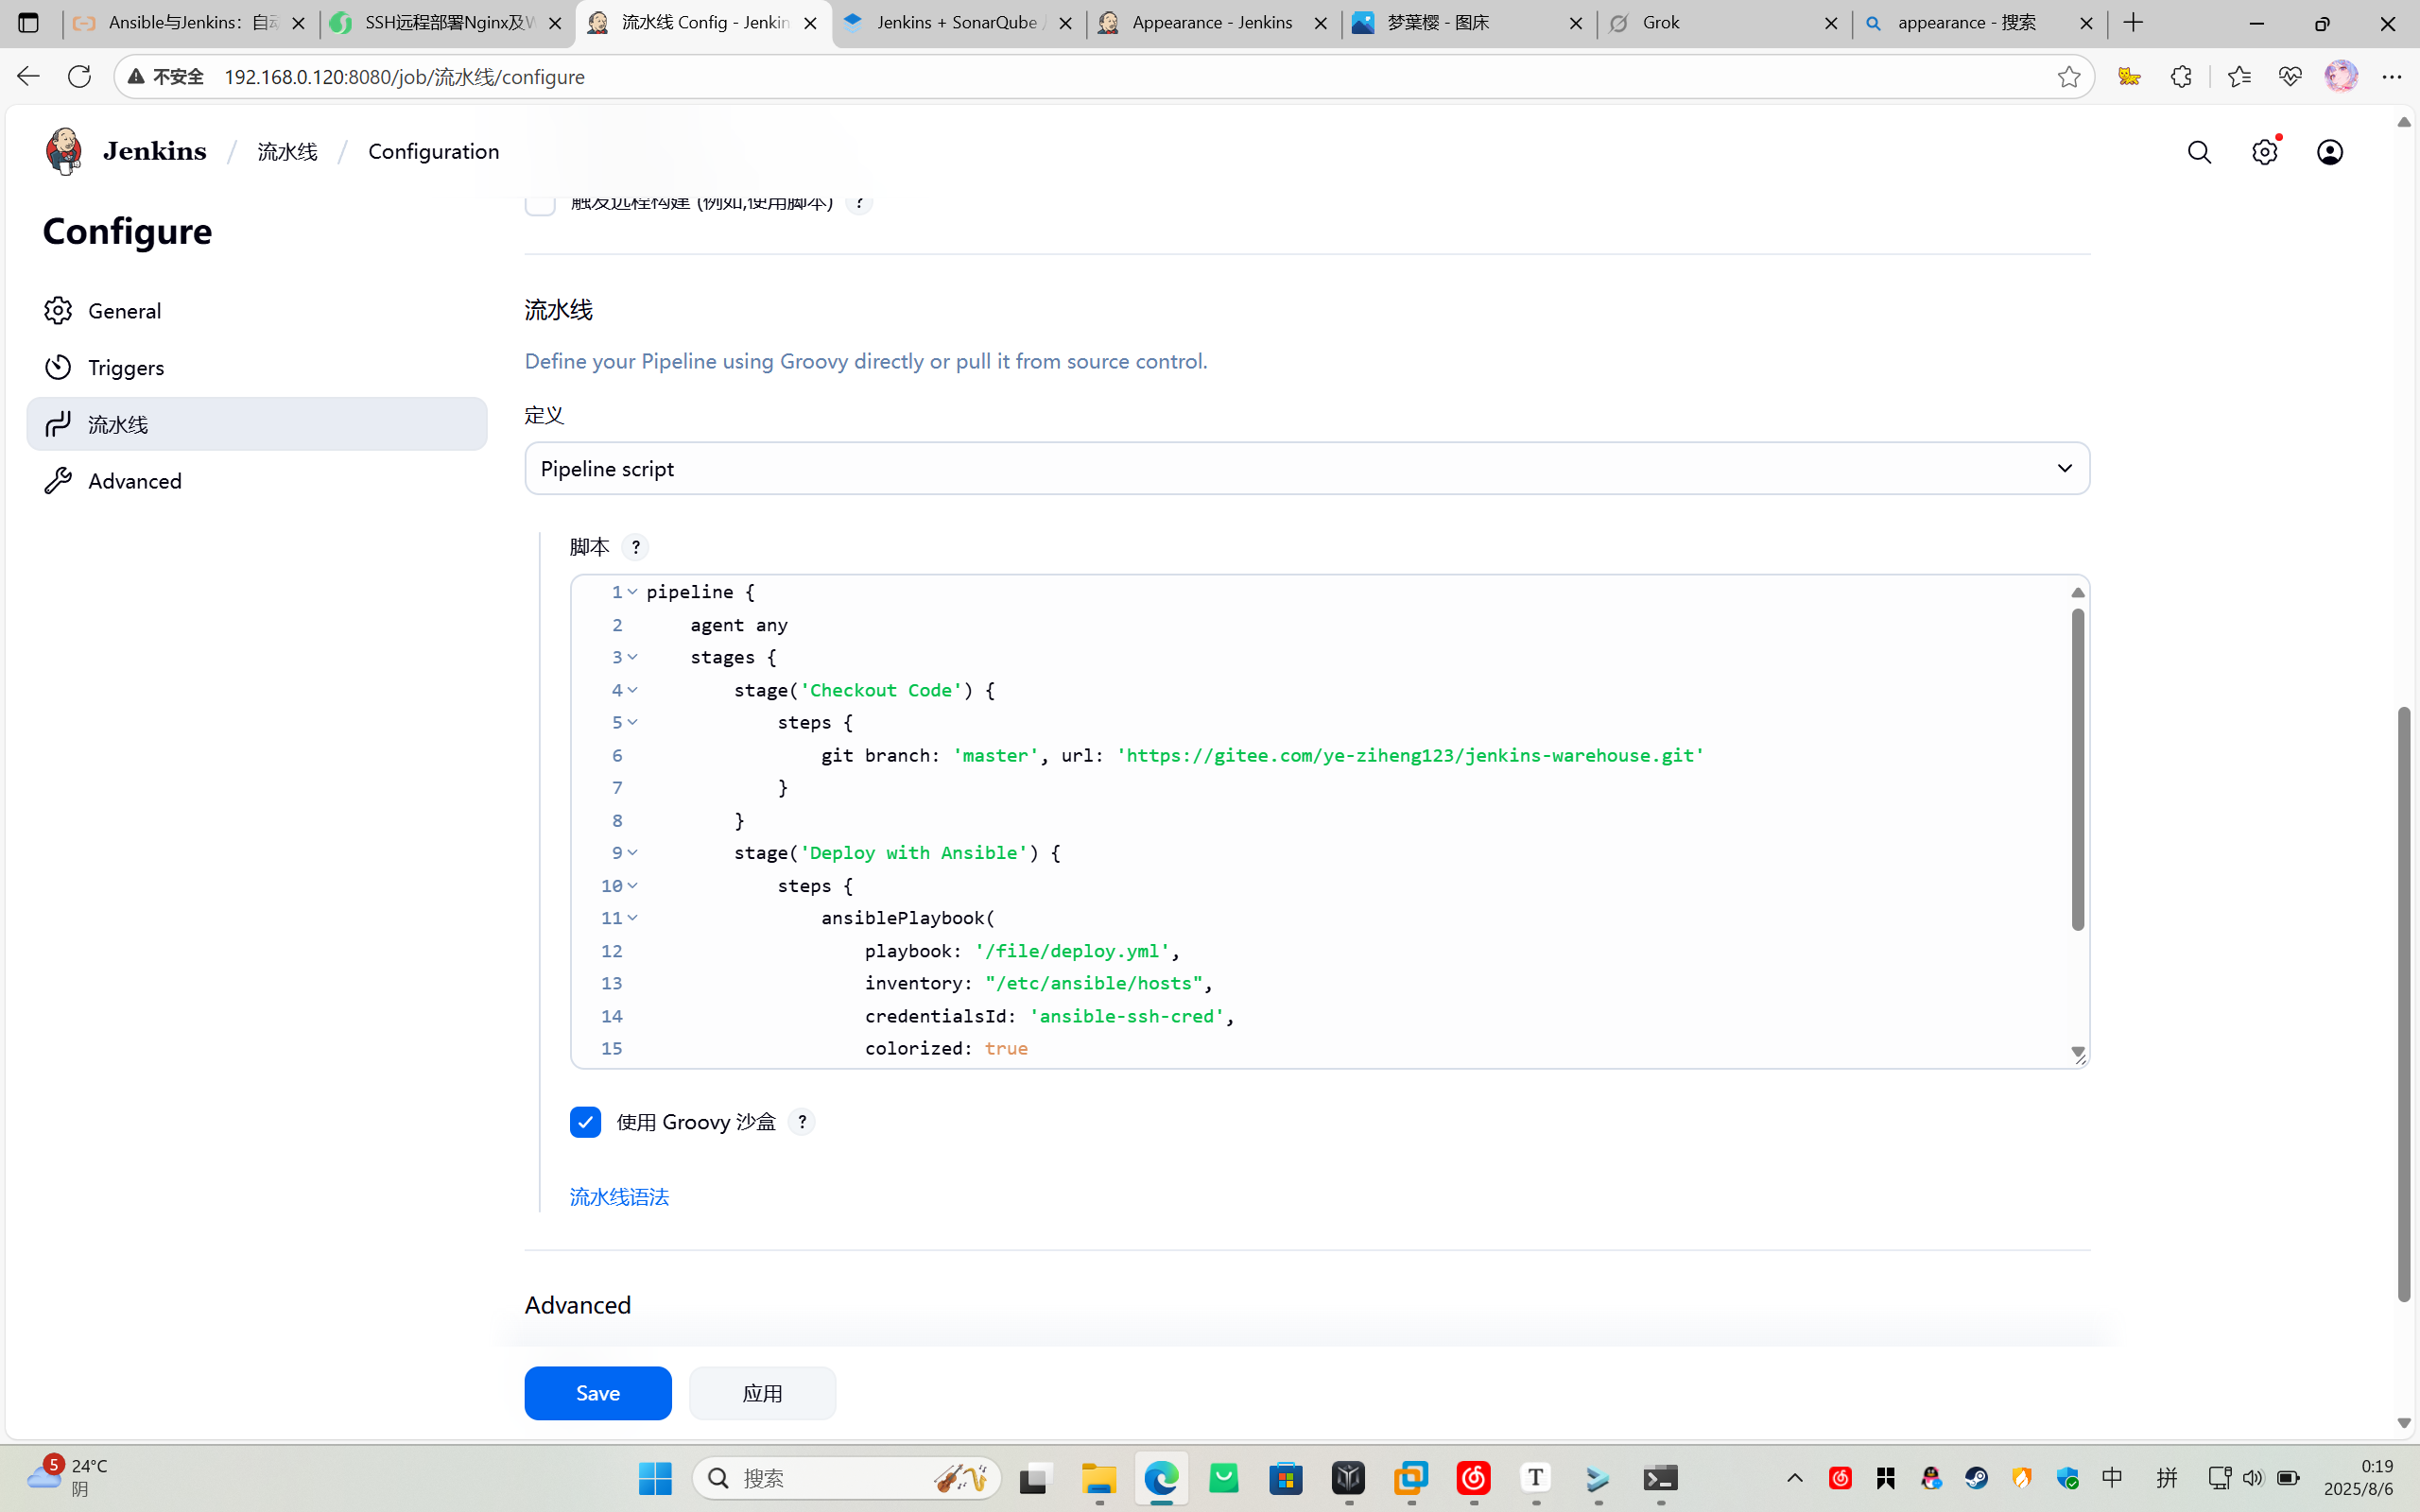
配置 GitHub/Gitee Webhook(需要公网服务器环境):
- 在 GitHub/Gitee 仓库设置中,添加 Webhook:
- Payload URL:
http://你的服务器IP:8080/github-webhook/ - Content type:
application/json - Events: 选择“Just the push event”。
- Payload URL:
- 在 Jenkins 任务配置中,启用“GitHub hook trigger for GITScm polling”。
PS:除非虚拟机有映射到公网的手段,例如:内网穿透等。否则,请不要使用虚拟机测试。
- 在 GitHub/Gitee 仓库设置中,添加 Webhook:
测试流水线:
- 手动点击“立即构建”测试流水线。
- 修改
index.html并推送到 GitHub/Gitee,Jenkins 应自动触发部署。
第五部分:验证部署
- 验证部署:
- 访问
http://192.168.0.121,确认页面更新。 - 检查 Jenkins 构建日志,确认 Ansible 任务执行成功。
- 访问
第六部分:最佳实践与扩展
Ansible:
使用角色组织复杂 playbook:
ansible-galaxy init roles/nginx加密敏感数据:
ansible-vault create secrets.yml
Jenkins:
使用“Pipeline as Code”:将流水线脚本存储在
Jenkinsfile中并提交到 Git。pipeline { // 内容同上 }定期备份 Jenkins 配置:
tar -zcvf jenkins-backup.tar.gz /var/lib/jenkins
扩展:
- 添加测试阶段:在流水线中加入单元测试或静态代码分析。
- 部署多环境:修改 Ansible 库存文件,支持开发、测试、生产环境。
- 监控:集成 Prometheus 和 Grafana 监控服务器状态。
第七部分:单独使用 Ansible 进行部署
在不使用 Jenkins 的情况下,Ansible 可以通过手动或脚本触发 Playbook 来完成部署。以下是单独使用 Ansible 的步骤:
确保环境准备完成:
- 按照“第一部分:环境准备”完成 Ansible 安装、SSH 配置和库存文件设置。
编写和测试 Playbook:
使用第三部分中的
deploy.ymlPlaybook,无需修改。手动运行 Playbook:
ansible-playbook -i /etc/ansible/hosts /file/deploy.yml
自动化触发(可选):
使用 cron 定时任务: 创建一个 shell 脚本(例如
deploy.sh):#!/bin/bash ansible-playbook -i /etc/ansible/hosts /file/deploy.yml赋予执行权限:
chmod +x deploy.sh添加到 cron 任务(例如每小时运行一次):
vim /etc/crontab添加:
0 * * * * root /root/shell/deploy.sh
验证部署:
- 访问
http://192.168.0.121,确认 Web 页面更新。 - 检查 Ansible 输出日志,确保没有错误。
- 访问
优点与局限:
- 优点:简单直接,适合小型项目或一次性部署任务,无需额外的 CI/CD 服务器。
- 局限:缺乏 Web 界面和自动化触发机制(如 Git Webhook),不适合需要复杂工作流或团队协作的场景。
第八部分:单独使用 Jenkins 进行部署
在不使用 Ansible 的情况下,Jenkins 可以通过脚本或 SSH 直接执行部署任务。以下是单独使用 Jenkins 的步骤:
确保 Jenkins 环境准备完成:
- 按照“第一部分:环境准备”完成 Jenkins 安装和 Git 插件配置。
- 确保目标服务器(
192.168.0.121)已配置 SSH 访问,并安装 Nginx。
创建 Jenkins 自由式任务:
在 Jenkins 仪表板,点击“New Item”,选择“Freestyle project”,命名为
Web-App-Freestyle-Deploy。配置 Git 仓库:
- 在“Source Code Management”中选择 Git,输入
https://gitee.com/ye-ziheng123/jenkins-warehouse.git,分支为main。
- 在“Source Code Management”中选择 Git,输入
添加构建步骤:
选择“Execute shell”:
ssh root@192.168.0.121 << 'EOF'
sudo apt update
sudo apt install nginx -y
sudo systemctl enable nginx
sudo systemctl start nginx
rm -rf /var/www/html/my-web-app
git clone https://gitee.com/ye-ziheng123/jenkins-warehouse.git /var/www/html/my-web-app
cp /var/www/html/my-web-app/index.html /var/www/html/index.html
sudo systemctl restart nginx
EOF
配置 Webhook(需要公网服务器环境):
按照“第四部分:配置 GitHub/Gitee Webhook(需要公网服务器环境),配置 GitHub/Gitee Webhook 以触发自动构建。
PS:除非虚拟机有映射到公网的手段,例如:内网穿透等。否则,请不要使用虚拟机测试。
测试部署:
- 手动点击“Build Now”测试任务。
- 修改
index.html并推送到 GitHub/Gitee,确认 Jenkins 自动触发部署。
验证部署:
- 访问
http://192.168.0.121,确认 Web 页面更新。 - 检查 Jenkins 构建日志,确保脚本执行成功。
- 访问
优点与局限:
- 优点:提供 Web 界面、构建历史和 Webhook 触发,适合需要可视化管理和自动化的场景。
- 局限:脚本管理较为分散,难以复用,适合简单部署任务;对于复杂配置管理,Ansible 更高效。
官方资源
- Ansible 文档:https://docs.ansible.com/
- Jenkins 文档:https://www.jenkins.io/doc/